Staff Use of the patient Portal
OpenEMR v 6+
Introduction
Staff use of the Portal functionalities is conducted from the practice's EMR.
Fundamentally, the EMR and patient portal interact in four ways:* static information from the EMR is displayed in the portal, e.g., patient Demographics from
- the EMR appears in the patient's portal Profile
- patient submits content to portal for staff to approve and incorporate into their EMR record
- staff makes documents in the patient's EMR record accessible in their portal account.
- 2- way messaging between patient in the portal and staff in the EMR.
Please note!
Many of the portal- related staff activities and tasks are described in The OpenEMR 6.0+ Patient Portal Overview , which provides links to the previously existing pages that cover them. Those instructions will not be duplicated here.
The Portal Dashboard
As mentioned in the overview, The Portal Dashboard is the hub of most direct staff interactions with the Patient Portal. No need to re- summarize what can be done there, just go look.
Portal- Related Staff Tasks
Activate The Portal
This activity is covered in HOWTO: Activate the Patient Portal v6.0+
Configure An EMR User For Portal Access
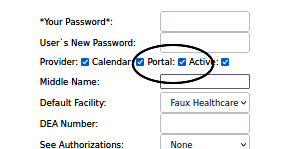
OpenEMR v6+ now requires that users be specifically authorized in their EMR user profile by an Administrator- privileged user to interact with the portal. This prevents the entire list of a practice's users from appearing as potential addressees in the portal messaging system.
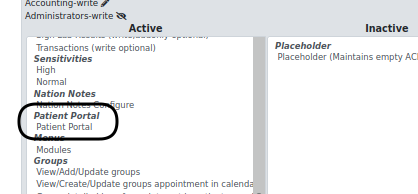
By default only OpenEMR Administrators have the 'Patient Portal' ACL assigned, to configure and administer the Portal. That capability may be given to other ACL groups if desired.
Authorize A Patient To Use The Portal
A patient may log in and actually use their portal account only after being authorized by practice staff from within the EMR. The staff authorization workflow is documented here: HOWTO: Activate a Patient's portal access - v6.0+
Reset A Patient's Portal Credentials
Once a patient has portal credentials, no matter if by self- registering or from staff assignment, they may be re-set from the patients EMR record by portal-authorized staff.
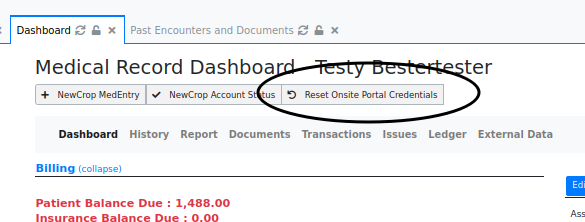
1. Open the patient's record and click the button, 'Reset Onsite Portal Credentials' (oval below)
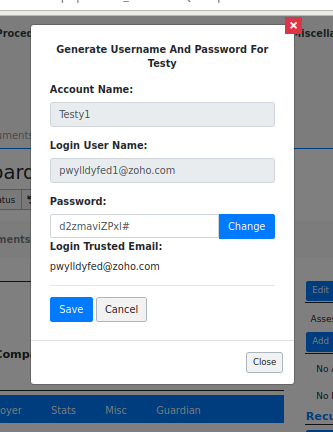
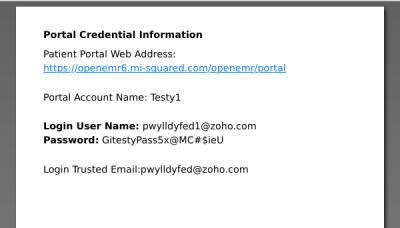
The dialog opens and the patient's credential is displayed with a new password.
2. If you want to change the password, either:
- click the 'Change' button to automatically generate another secure password
OR
- manually enter into the password text area a password of your own composition that meets the security requirements.
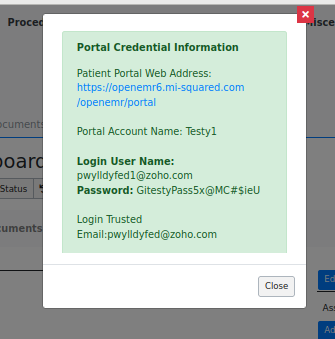
3. Click 'Save' and see the new credential summary (below)
4. The new credential may be printed and/ or saved as a pdf.
The standard credential summary display appears again:
5. Click 'Close' at panel's lower right (above)
6. If the practice's portal is configured to do so, the patient's trusted email account should receive the confirmation email
Approve A Patient's Portal Self-Registration
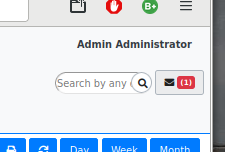
When a patient self- registers through the portal, a portal- authorized user will see upon logging in to the EMR, an indication of a new message in the widget under their user name.
1. Click on that widget or open the Messages window in the main menu.
2. Click on the name of the 'New Patient Portal User' (oval below)
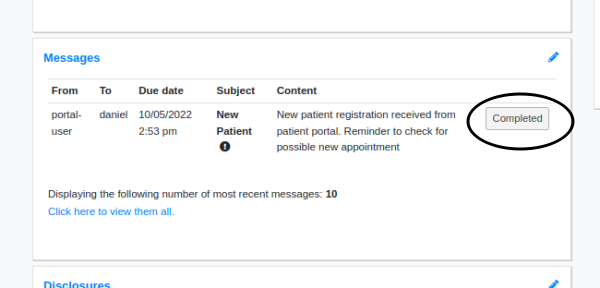
3. In the new patient record display that opens, see the message Content in the 'Messages' section.
4. Carry out whatever actions are indicated by the message or simply click on 'Completed' (oval above) to acknowledge the new patient's registration.
Audit Patient Portal Documents
A Patient may submit documents from the Portal, for portal-approved staff to screen and add to their EMR record. A review of those submissions is called an 'audit' and they are typically done through The_Portal_Dashboard, on which page the instructions can be found.
Processing Patient Payments From the Portal
OpenEMR version 6.0.0 patch 4 and higher has a Sphere Payment Processing Module included by default in its codebase.
With it payments may be made both from the clinic and the patient portal.
The module is documented in the wiki page, Sphere_Payment_Processing_Module which also discusses staff processing of payments by patients through the portal. Patient payments are pictured in the Accountings section of Patient Use of the Portal
Upload patient documents to their portal account
Staff may send documents to a patient through their portal account two different ways; both involve The_Portal_Dashboard.
1. If you need to give the patient a standard clinic form or document to sign or keep you can add the template for that document to their 'Documents Center'. From their portal account they can open and read and sign it, and either download it or keep it online in their collection of documents. See the 'Dashboard' page's section on Templates for details.
2. Send them a 'Secure Message' with the document attached, which they can download locally. See the section on secure messaging for details.
Processing Patient Portal Appointment Requests
Patients may request appointments on specific dates and times through the portal but staff must process those requests before they appear on the practice's calendar or are confirmed in the requesting patient's portal account.
NOTE: a provider's calendar schedule MUST be completely and properly configured with their personal daily schedule and 'In Office' and 'Out of Office' times, or the portal's Appointment screen will not permit appointment requests.
- Refer to the wiki documentation on configuring the calendar in OpenEMR 4.1. It's dated but still applies: Section 1.1 of Using the Calendar 4.1'
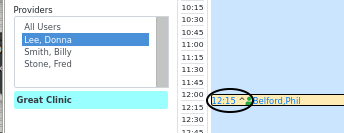
- An appointment requested by a patient of a provider will be displayed in the provider's schedule. It will have the caret ( '^' ) indicating a 'pending' status.
- A patient may also cancel an appointment from the portal in which case it will appear on the calendar with an 'x' status between the time and the patient name
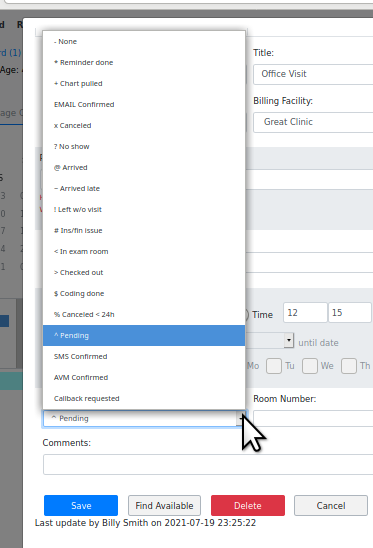
1. Click on the time indicator (oval in previous pic) to open it and change the status, including:
- 'reminder done'
- 'EMAIL confirmed'
- 'SMS confirmed'
- 'AVM confirmed'
- 'Callback Requested'
- Click 'Save' to set changes
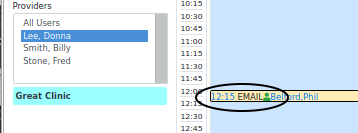
2. See calendar note reflecting the new confirmed status, e.g., 'EMAIL'
Conclusion
OpenEMR's Patient Portal is a deep and complex topic which has had many improvements and changes made to it in the past year or two. If I have missed anything that needs to be here feel free to let me know about it!
