Review EDI History Module
Purpose
… of the module: Kevin McCormick has roughed out this very promising module to read different EDI files to help diagnosing claim problems.
… of this document:
- provide user- oriented description of how the module can be used IN ITS PRESENT STATE as released in OpenEMR 4.2.0
- to suggest modifications
Harley Tuck - MI-Squared
Quick Reference
I put this quick reference up here where it's handy.
Once you've read the details in the main document below, this will make sense.
Prep:
- 1) Place the EDI files in local file system (My Documents etc), named with the necessary filename extensions
- 2) If in Linux re- create tmp directory
Operation:
- 1) In 'New Files' tab browse to EDI files and select.
- 2) Click 'Submit'
- 3) Repeat until all desired files have been selected.
- 4) Click 'Process'
- 5) Open tab 'CSV Tables'
- 6) Select type of EDI file from 'Select CSV table' dropdown
- 7) Select '% of rows' /OR/ enter DOS range, /OR/ enter encounter number
- 8) Click 'Submit'
- 9) Click on desired informational links in resulting display
Introduction
This document will describe the preparations necessary to use the module then discuss each tab in the display and what information is available in each one.
See Kevin McCormick's README doc on the module's Notes tab for important general and developer- oriented information; EDI file criteria, etc, most of which I won't reproduce here.
Since the module is not in its final form some basic computer skills are required to make it as useful as possible.
- Users must know how to place files in specified locations in their systems.
- Users must have administrative access to their system to do one particular task (described later), or know a Guru able to do it for them. But it's not rocket computer science.
- The account of the person using the EDI History module must have Billing or Administrator permissions.
I tested the EDI History module with the .deb package install of OpenEMR 4.2.0(1) on a Linux Mint 17.2 desktop; also on a Windows 7 VM using the XAMPP-OpenEMR 4.2.0 package. Both versions functioned identically.
CAVEAT: I don't have access to a full complement of EDI files that are properly associated with each other; e.g., the x12 claim files sent to payer; the ERA files with payments for those claims; the related 999/ 997 and other files pertaining to those claim and ERA files. Doubtless more information and fewer errors would be available in a real environment.
Preparation
Put in a known location (e.g., Documents? My Downloads?) the EDI files you're going to input to the module.
- My observation is that the ERA files should be renamed .era; the others according to their type. See the README file in Notes tab for more on this.
- Also: I obtained an ERA file with a .txt extension and the code inside had '|' delimiters instead of '*'. Wouldn't process. Renamed the file to '.era' and search/replaced the pipe delimiters with asterisks and it processed just fine.
You must have or make a temp directory (aka folder) to hold new files being processed in.
- If reviewing previously entered files, no tmp directory needs to be created, in most cases.
- At the moment the temp directory path is hard coded into the module so can only be one place in the system.
- Making the tmp directory is easy on a desktop install of OpenEMR; if installed on a remote server, IT SystemAdmin-level help will be needed; not described here.
Linux: the temp folder does not persist across reboots so will have to be recreated each time the system starts again.
- Creating the tmp directory requires use of 'sudo' or 'su'.
- This is the only need for admin access.
- Open a terminal window and enter these commands:
- [code tag:]
- sudo mkdir /tmp/edihist
- (provide your account password if asked)
- sudo chmod 777 /tmp/edihist
MS Windows (any version): the temp folder persists across reboots so only needs to be created once.
- In your user account, which must have Administrator privileges, create the folder:
- C:\Windows\Temp\edihist
- "(say 'Yes” when it asks, "Confirm to always be able to access Temp")
The EDI History module is ready to use.
Use
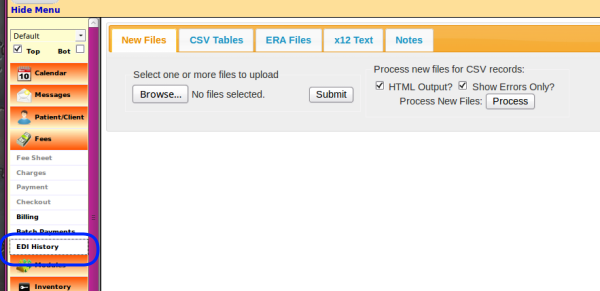
In left Nav menu: Fees -> EDI History
The general workflow:
1) upload and process the EDI files into the module with the 'New Files' tab dialogs
2) examine the different file types in the other tabs corresponding to the file types.
Common Display Items
The different tabs show many of the same columns. Some column content is linked to other displays and those displays always show the same information. E.g., column CLM01 will always show the claim information no matter what tab it appears in. I won't describe each column in every tab, only the ones unique to that display.
This is a list of the columns that appear in multiple tabs.
In all cases you can click on the column headings to sort the display on that column's contents.
- Name: of pt
- File or File Name: see the contents of file itself.
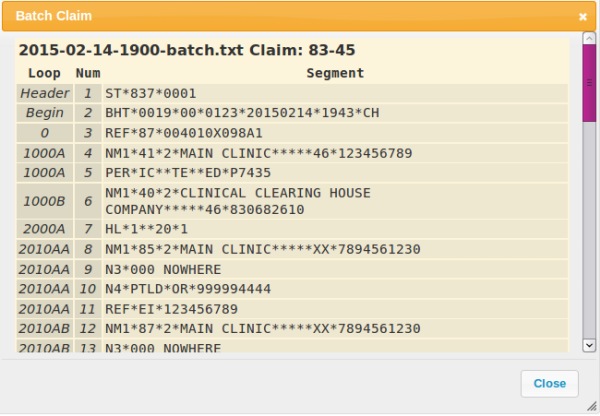
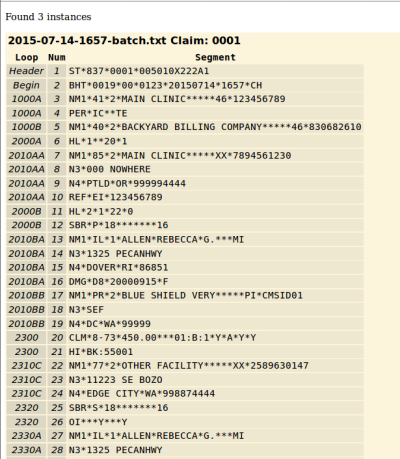
- CLM01: see the claim information in a table with the segments and loops indicated
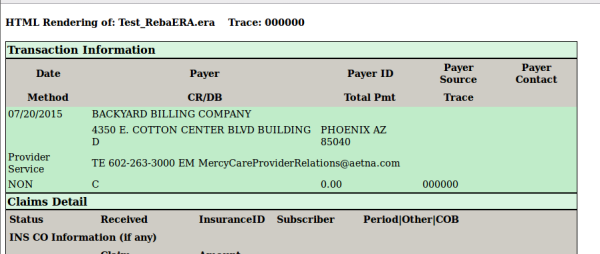
- Trace: adds a block of Transaction Information on top of the RA Claim Detail
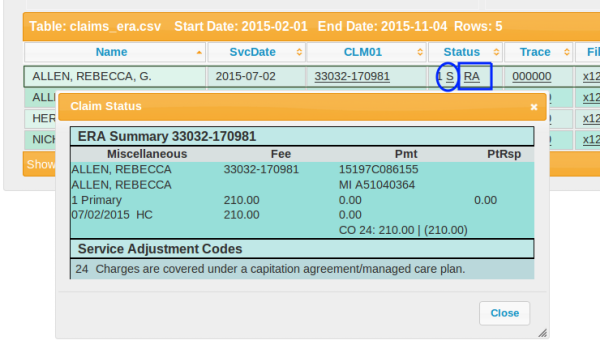
- S: status panel (blue circle) gives a brief summary of that claim's status
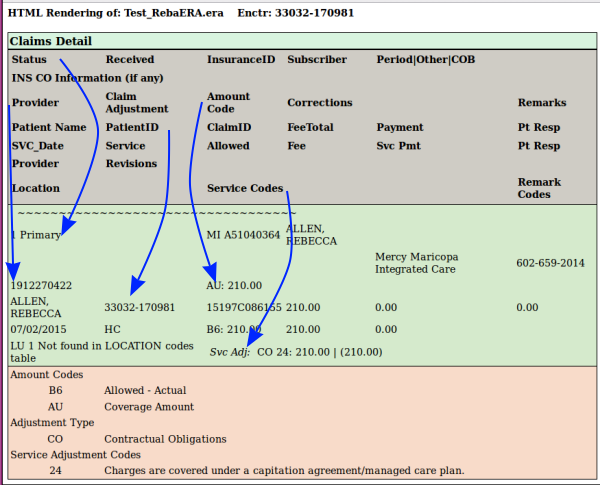
- RA : (square above) Remittance Advice; html display of Claim Detail
- Note the arrangement of headers in the panel above the data. Follow the arrows in this example:
- Claim Status: “primary”
- Provider: rendering provider's NPI
- Patient ID: OpenEMR's usual identifier of PID with encounter number
- Amount Code: “AU: 210.00”
- Service Codes: "Svc Adj: CO 24: 210.00 etc"
- Then the Service and Amount codes that are used in this display are detailed in the bottom panel.
Tab: New Files
Imports new EDI files to create the collection of files you may examine at your leisure in the other tabs.
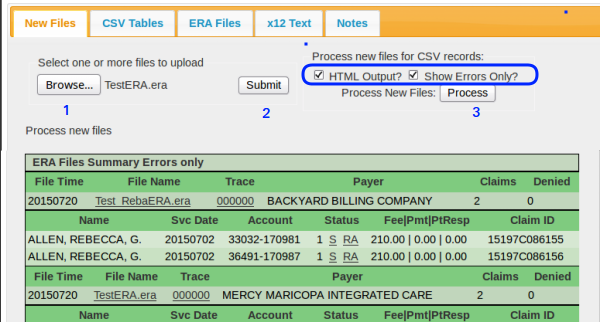
- 1. Click 'Browse' button to select and upload the file from wherever it is stored in your system; Downloads was suggested earlier.
- Can put multiple files in a .zip archive and upload it; the files will be processed at one time.
- 2. Click 'Submit'
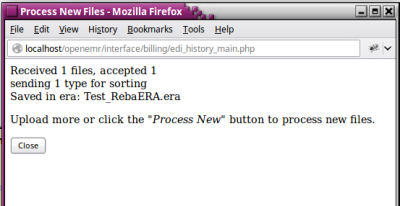
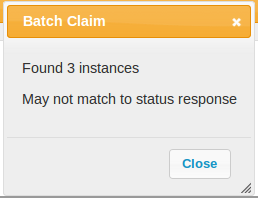
- See either the success popup ...
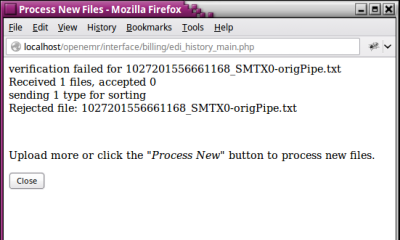
- or the rejected popup
- 3. Click 'Process'
- See summary listing of the uploaded and processed files.
- Decrease output to the screen when uploading multiple files by unchecking the 'html output' checkbox (oval)
- Can check the 'Show Errors Only' box and not display the good files.
- Here it's just showing the files that have errors. These sample files were sloppily modified for use in this tutorial- they all have errors.
- Will get warning if uploading duplicate files
Tab: CSV tables
The CSV tab lets you navigate the collections (the contents of which are listed in .csv files) of EDI files that have been registered into the module.
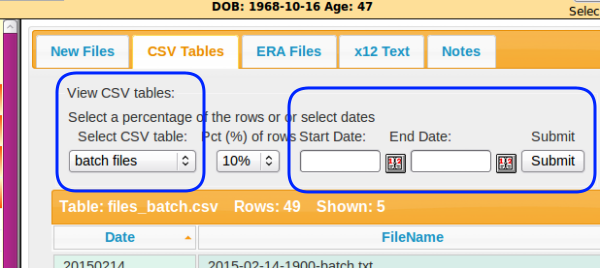
- Allows for three different ways of searching for EDI files:
- Percentage of processed files
- Billing date range
- Encounter number
- 1. Select from the "Choose from list" dropdown the EDI file type to view.
- On first use the list is empty; more types are added as they are processed into the module
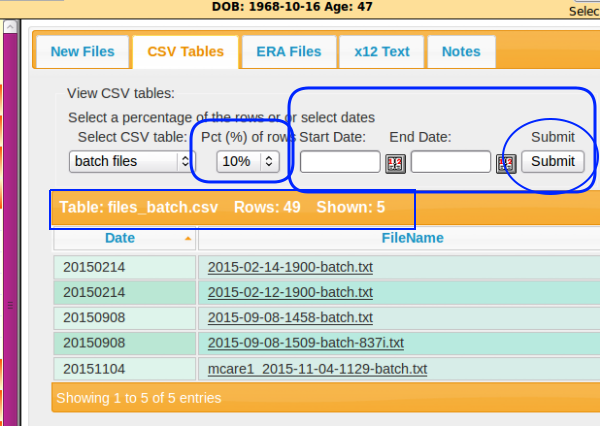
- 2. Select '% rows' dropdown: in the CSV tables, one row references one file. This chooses the percentage of the files you have of that type.
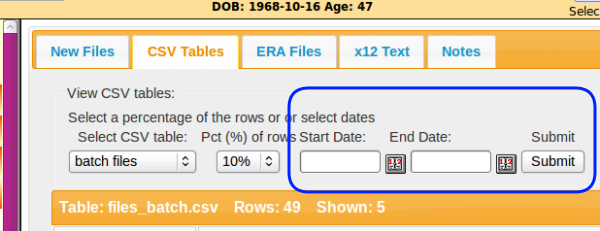
- OR: 2. Select billing date range
- empty dates retrieves all files
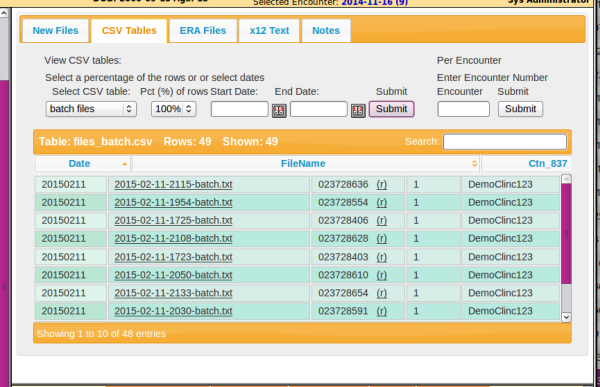
- 3. Click left 'Submit' button (oval)
- E.g., here we have 49 files (rows), showing 10% of them, rounded up.
- OR:
- 2. Enter an encounter number and view the batch files it appears in.
- Curiously, this 'encounter number' search only looks in claim batch files, not in the file type selected in the 'CSV' dropdown at the left.
- 3. Click the right 'Submit' button (blue arrow)
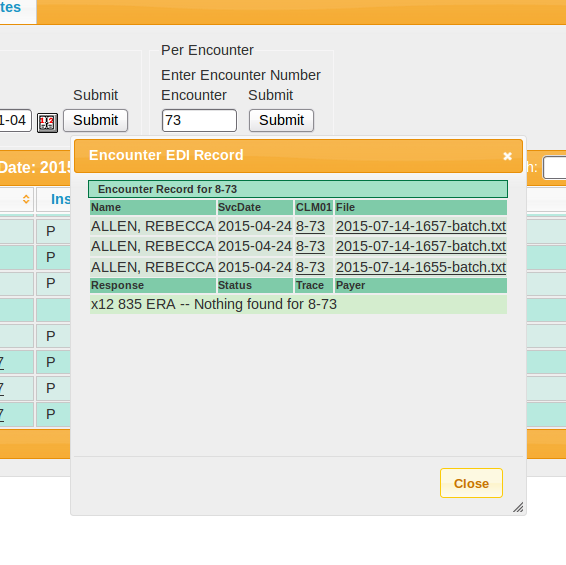
- In this case, we have many duplicates; a realistically populated system should display usefully.
- See the Response note at the bottom indicating that no ERA files have been registered for the claim(s) in this encounter
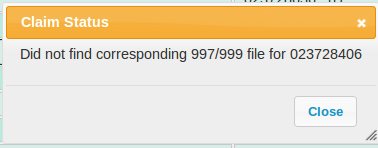
- This error (below) may display in blank browser tab, As far as I can tell, it's because I did not click the 'Process' button when uploading in 'New Files' tab
Let's move through the file types in the 'CSV table' dropdown list that have been processed in.
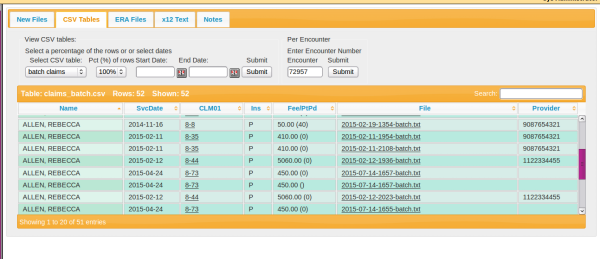
Dropdown: Batch Claims
Info re: the claims contained in the X12 batch files, not re: the files themselves.
- Shows 1 line per encounter; will duplicate lines if same encounter is in different batch files.
- Unique columns:
- Ins: billed to P primary/ S secondary/ T tertiary
- Fee/pt pd: insurance /vs/ pt payments
- Provider: rendering provider NPI
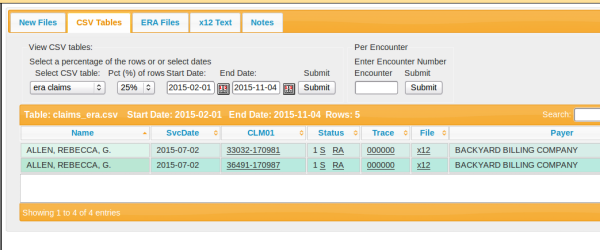
Dropdown: ERA claims
The claims paid in the ERA files, not the files themselves.
- Shows 1 line per status in the claim response.
- e.g., if an encounter has a claim with a '1 accepted' status and one with a '22 reversal/ refund' status,
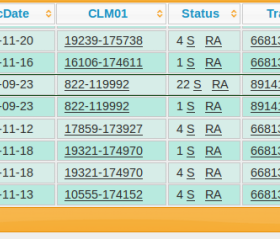
- 2 lines will be displayed, one for each status, as in claim 822-119992
- In this example
- e.g., if an encounter has a claim with a '1 accepted' status and one with a '22 reversal/ refund' status,
- Unique columns:
- Payer - ... the payer
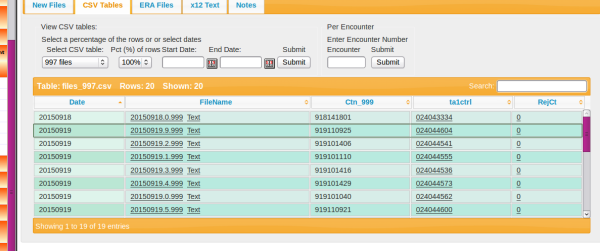
Dropdown: 997 files
I'm not clear on this one. It accepted a file named .999 but not the same file renamed .997. Then the column links didn't show anything useful.
- Unique columns:
- 'text' have only gotten error: " csv_filetohtml: failed to classify"
- Ctn_999: 999 file control number?
- ta1ctrl: " Failed to identify file with control number [9 digit number] "
- Probably I didn't have the 999/7 file associated with a claim or ERA file
- RejCt: with '0' value: "No rejected claims indicated in [FileName]"
Dropdown: batch files
The x12 batch claim EDI files from OpenEMR that go out to the clearinghouse.
- Unique columns:
- date: date of service
- Ctn_837: click (r) for corresponding 997/999 file
- Claim Ct: number of claims in file
- x12 Partner: clearing house
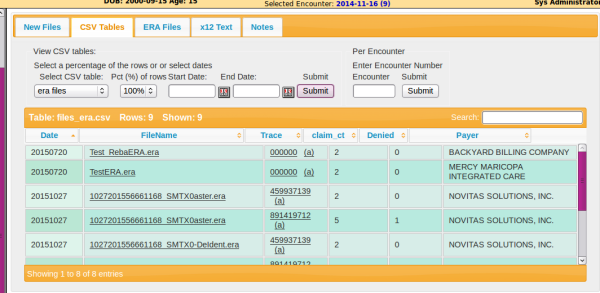
Dropdown: ERA files
Info on the processed ERA files themselves, not just the claims in them.
- Unique columns:
- claim ct: number of claims in file
- denied: number of claims denied
- payer: payer
Tab: ERA Files
Display the html screen of ERA file's Transaction Information and Claims Detail
- Browse to ERA file where they're stored, click 'Submit'.
- or search by specific encounter, PIDs or check number
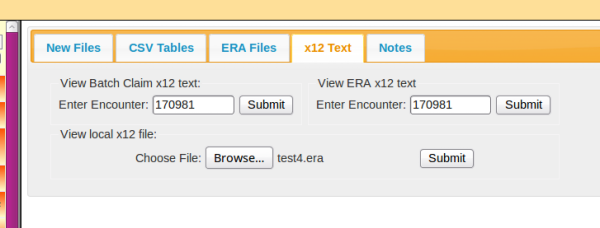
Tab: x12 Text
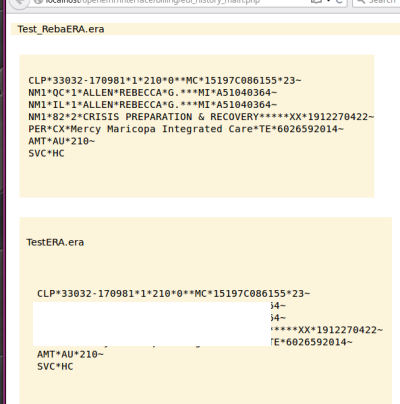
Displays on separate browser tab all x12 batch claim or ERA EDI files that contain the encounter numbers entered.
- "Choose file: browse': browse to desired file and just get x12 file display.
- This display requires the temp directory to have been created for this session
- Result may have multiple parts if for some reason the encounter appears in multiple ERAs
-
- View x12 batch claim or ERA x12 text: search by encounter and get parsed display w/ loops
Tab: Notes
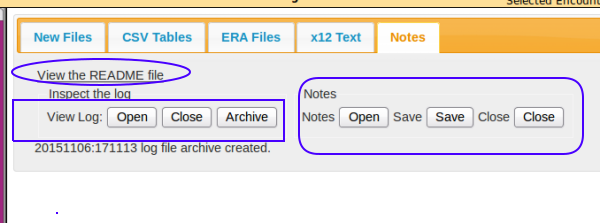
Per the README: "The "Notes" tab allows you to view the log file and have a plain text notes file. "
- Link: "View the README file" (oval) - definitely do; lots of information about the module
- "View Log" (Rectangle) - opens / hides the activity log with its listing of the errors found processing files in.
- 'Archive' button deletes curent log and starts a new one.
I had a 4 line log file; clicked 'Archive' and was informed it was too small to archive.
Archive limits are unknown to me.
- Notes (round rectangle): "... plain text notes file..."what he says; parameters unknown.
Comments
In my opinion, with a little effort this EDI History module as it is now provides some information that can be important to billing workflows. It has great potential for even more utility with some work on the code though I'm not in a position to say how much work that would require.
My evaluation was hampered by lack of access to all file types. If you have all the different types of files in the required format this module could give a comprehensive picture of a facility's billing status.
Suggestions:
- First priority: make the temp dir persistent and automatic so the user doesn't have to mess with it
- make it easy to delete files from the collection
- change the “CSV Table” tab name to something more generic, like "View Files"
- consider making it parse more variant filename extensions and contents
- consider removing the ERA files and x12 Test tabs- they just duplicate what's already on the CSV Tables tab.
- UI things like progress/ completion indicators would be helpful
Thanks, Kevin, for this promising tool!
- HTuck
