Procedures Module Configuration for Manual Result Entry
Preface
The goal of this guide is to provide a set of step-by-step instructions for setting up the Procedures Module to enter diagnostic results by hand. Doing so brings this data into the Encounter Form and closer to the clinical note.
Configuration necessitates meticulous attention to detail and order of execution. Once properly configured, deployment is relatively simple by comparison.
It is possible to upload a scanned image of results into Documents/Medical Record, but that will place the data at a further distance from the clinical note.
To transmit orders and receive results from an external laboratory facility, refer to Laboratory Exchange User Documentation.
Facility
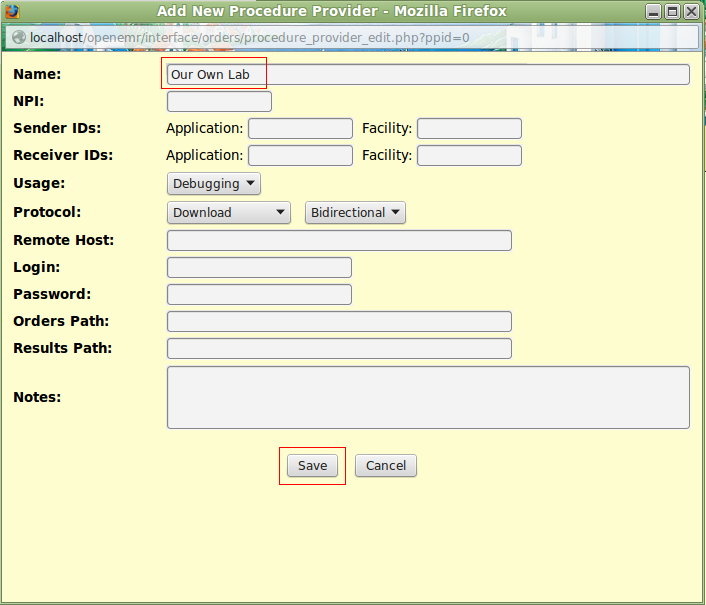
Despite the fact that no orders will be transmitted to an external facility; it is necessary, however, to manufacture a fictitious Lab Service in order to configure this module. If the practice has an in-house lab, enter its name. "Our Own Lab" will the Lab Service for the purpose of this exercise.
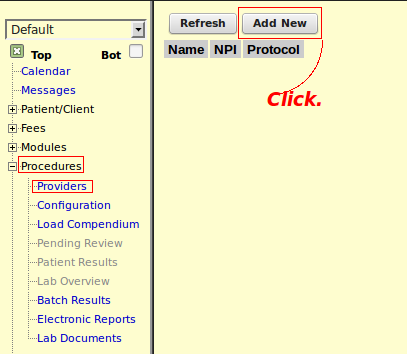
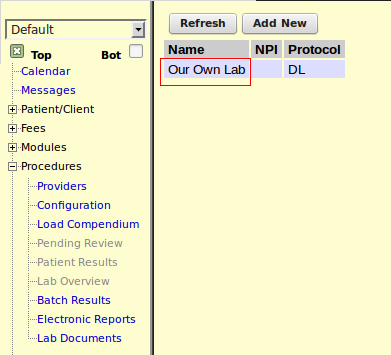
From the Menu on the left side bar, go to Procedures/Providers and add "Our Own Lab".
Configuration
Manual Method
The module can be set up for a panel of tests or for a single study. A panel will require a 4 tier process while it is only 3 for a single test.
Panel
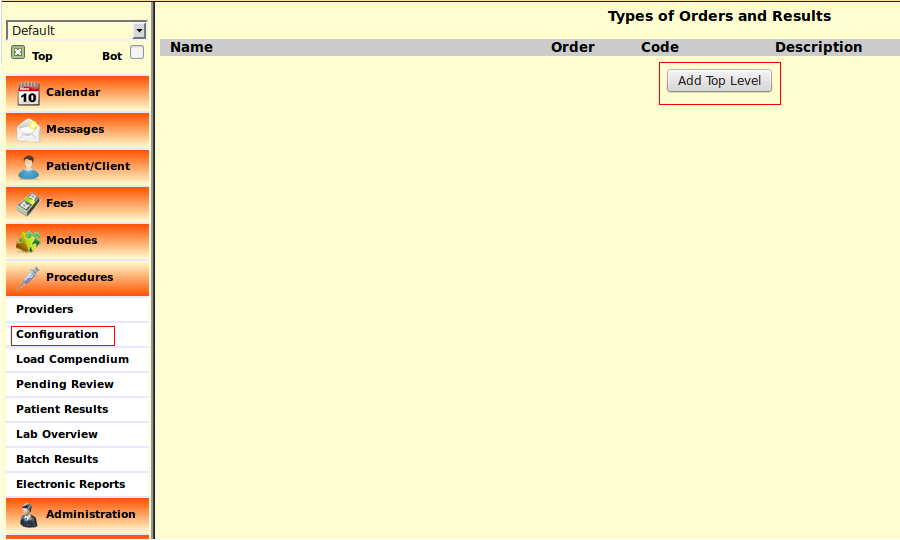
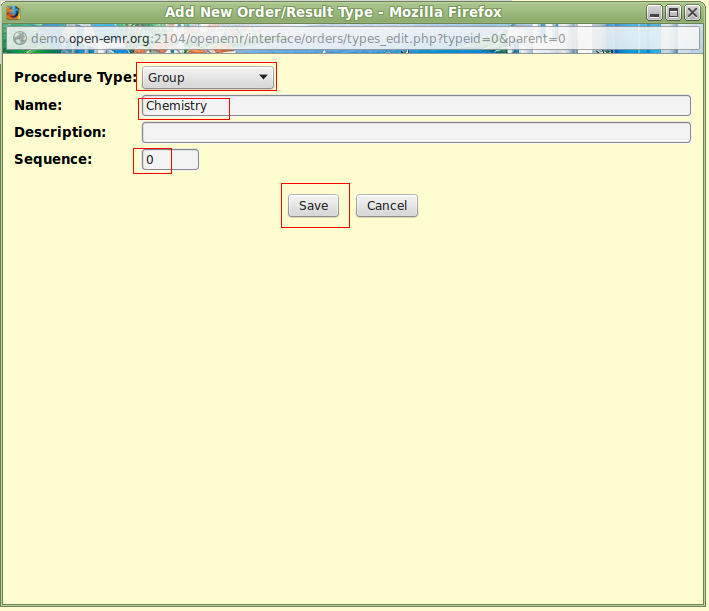
Click the Configuration link and the "Add Top Level" button to begin. This button must be clicked each time a new panel or new single study is added to the list.
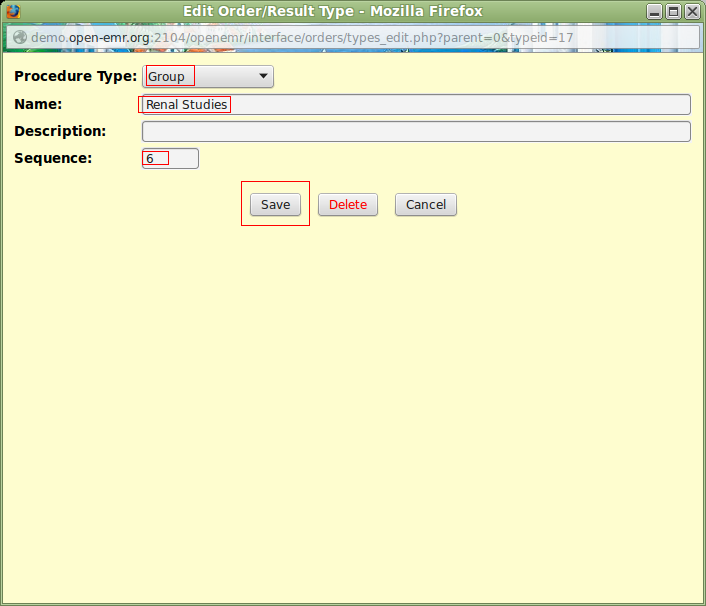
The first tier, or level, of the configuration, will be the naming of the Group. Maintain the Sequence to keep the list in the desired order.
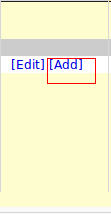
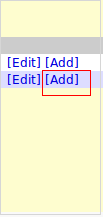
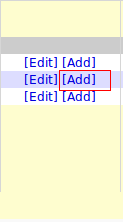
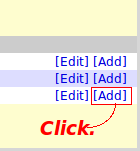
To begin the second tier of configuration, click the "Add" link. Use "Edit" to modify configuration. To delete a setting, click "Edit" and go to the desired dialog box to delete the entry.
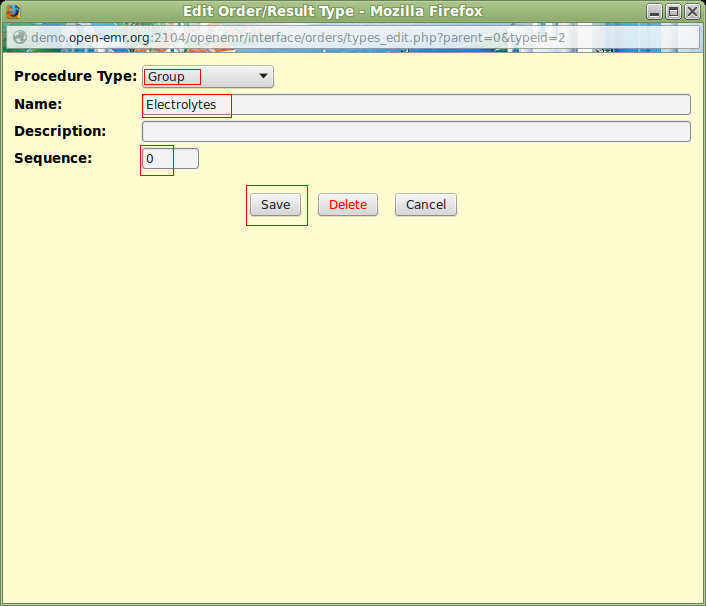
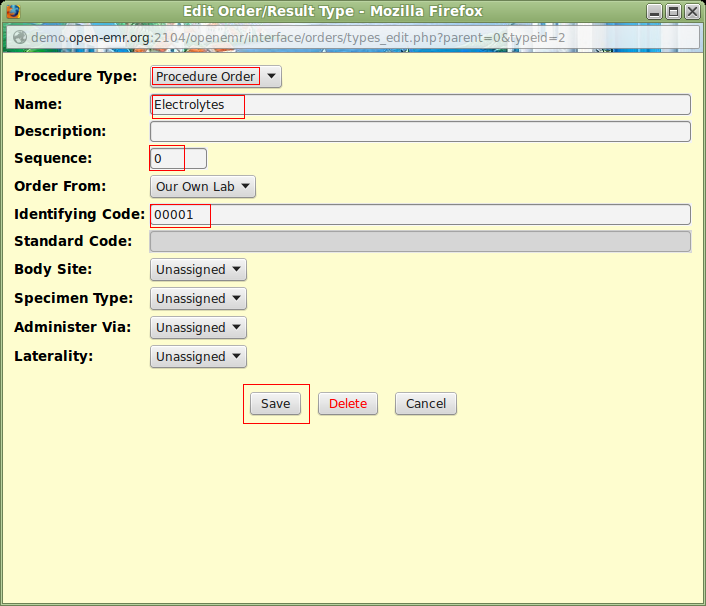
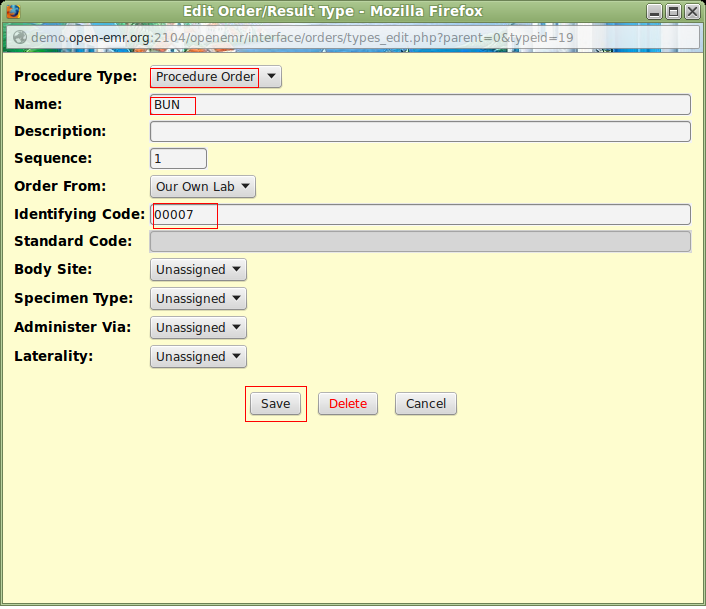
The second tier involves naming the Group as "Electrolytes" and assigning an Identifying Code to it. The choice of numerals or letters is at the discretion of the practice.
Be certain that there is a "Yes" under the Order column and an Identifying Code as well. If these items are missing, it is a warning that the configuration had been faulty. The entries must be deleted and the process begun anew.
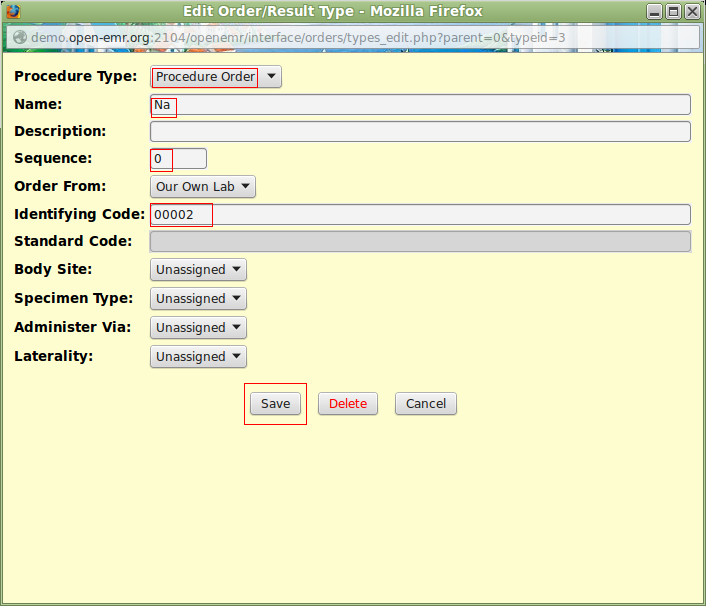
Click the "Add" link associated with "Electrolytes" to begin setting up Sodium.
The third tier will configure the first test of the panel, namely Sodium. Fields left empty are optional.
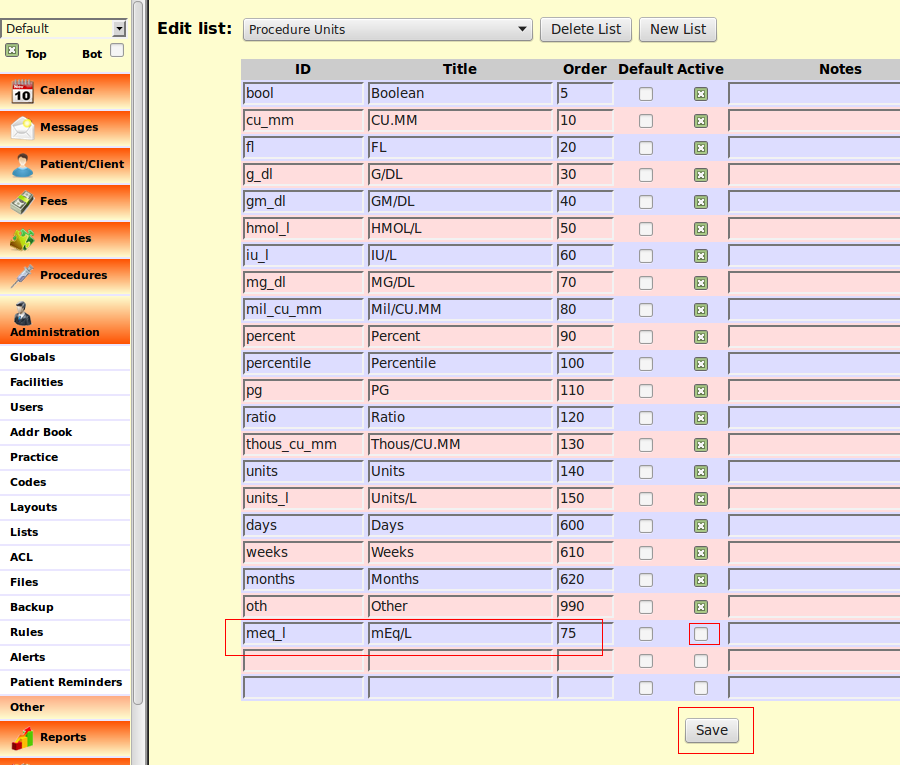
Because mEq/L was missing; it had to be added in Administration/Lists/Procedure Units. Remember to make the addition Active before saving it.
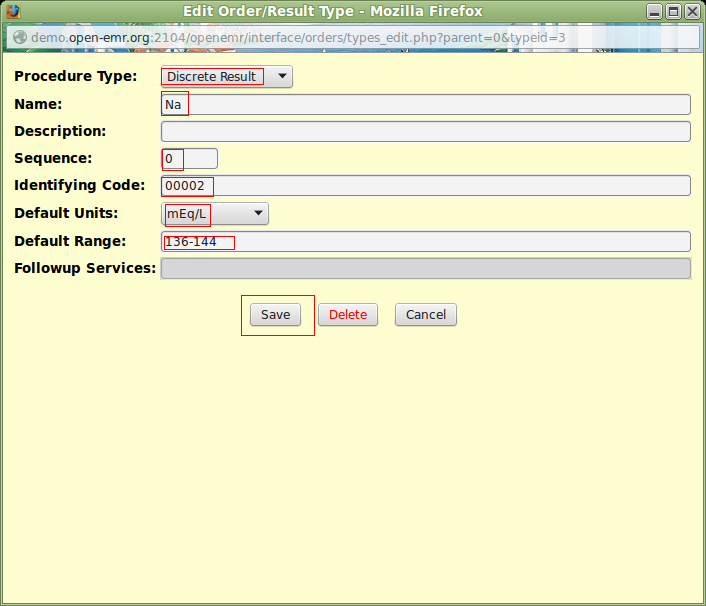
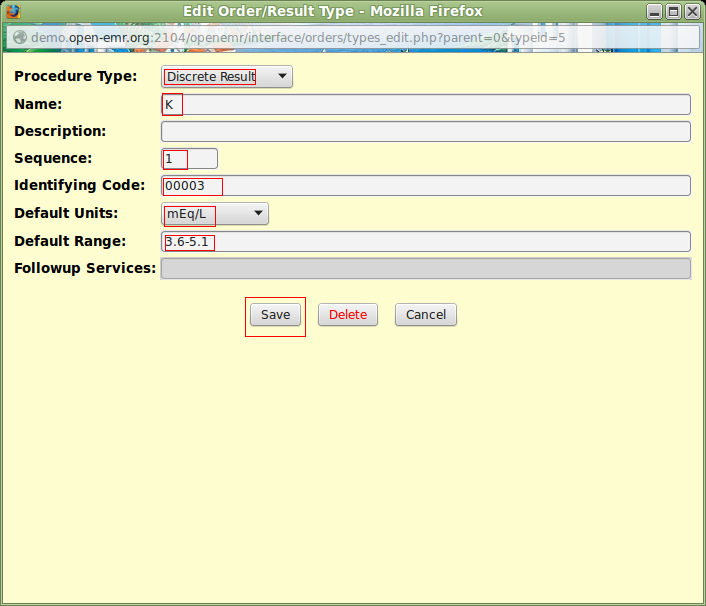
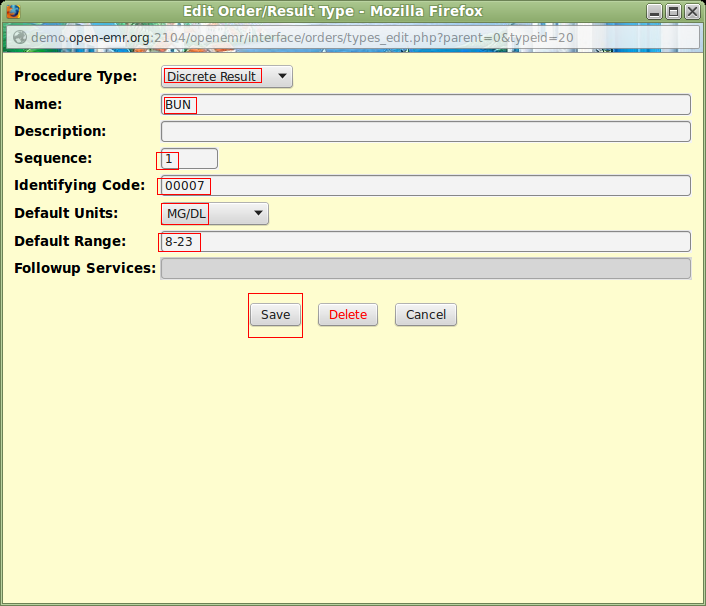
It is helpful to have the range of values for a particular test in Discrete Result; but Recommendation is optional. Click "Add" link on the same line as Sodium to configure the fourth tier, Discrete Result.
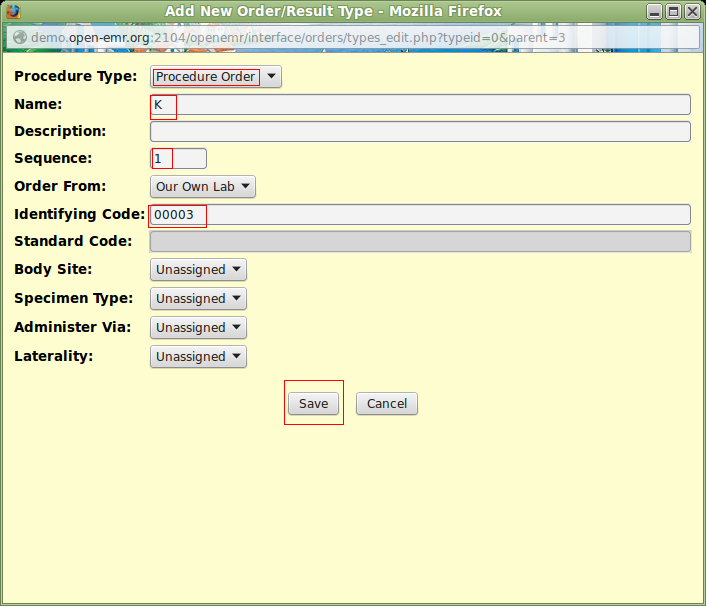
A similar process is used to add the other tests of the panel. Again click the "Add" link associated with "Electrolytes" to begin. Pay close attention to Sequence; otherwise the tests will appear in alphabetical order; not Na, K, Cl, CO2 as physicians are accustomed.
Click "Add" on the Potassium line to configure Discrete Result.
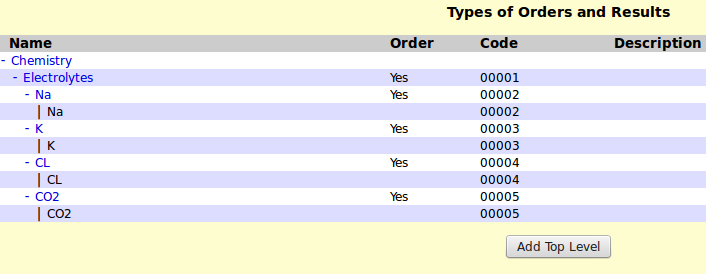
A full panel should look like the following.
Single Study
Click "Add Top Level". A single test requires the naming of the Group and of the test.
Check that "Yes" and the code are present. Click the "Add" link to configure the third tier, Discrete Result.
Bear in mind that if there is a study which has different normal values depending on the gender of the patient, the user must assign different Identifying Codes for each Discrete Result. An example would be Hemoglobin/Hematocrit. If the user assigns only one code for the 2 Discrete Result ranges, there will a configuration problem.
Load Compendium
If the user partners with Diagnostic Pathology Medical Group, Pathgroup Labs LLC or Yosemite Pathology Medical Group, he can obtain from them a data set of diagnostic studies for the Procedure module to avoid manual configuration.
Database Method
Users who don't use the services of the above mentioned vendors can try their hand at configuration of tests with phpMyAdmin. The Forum discussion can be found here.
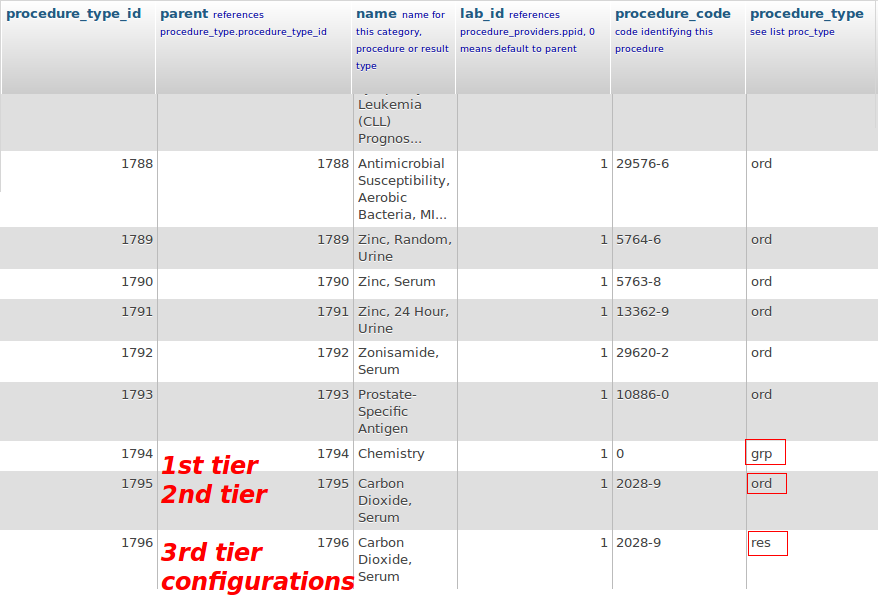
There are 1794 studies in the Mayo Clinic data set. For most practices this list will need to be whittled down. Only Carbon Dioxide has been configured with 3 tiers. The balance will need additional work setting up Group and Discrete Result. It will do the reader little good if he can search for the test but unable to enter lab results.
Preparations
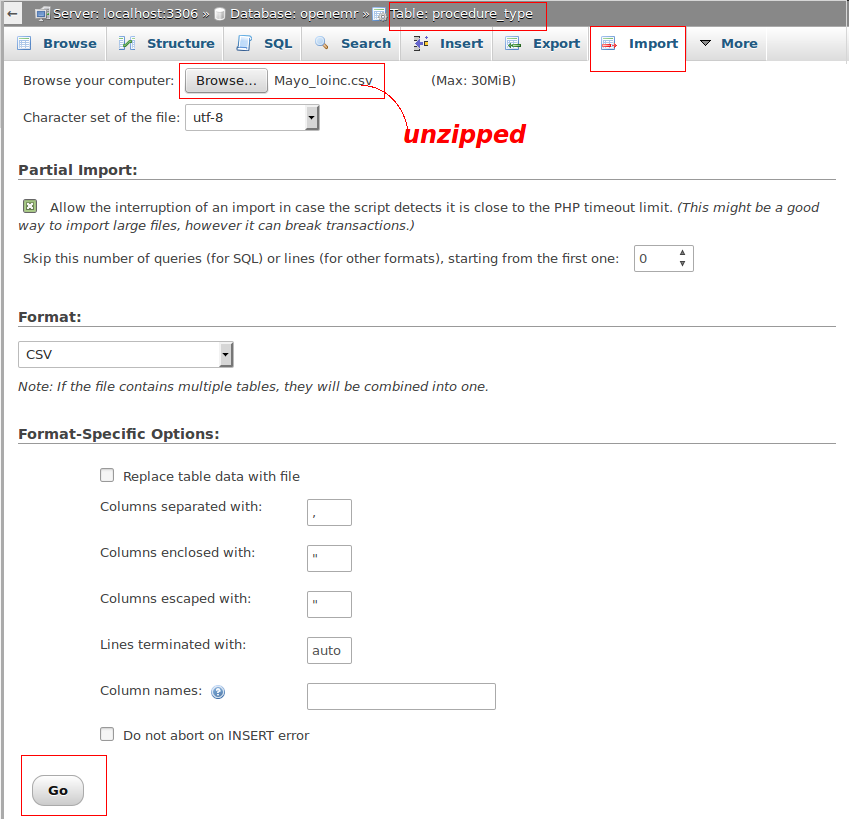
Download this data set, Mayo_loinc.zip. Because phpMyAdmin will only accept a zipped .sql file (this is a zipped .csv file), it must be extracted before import.
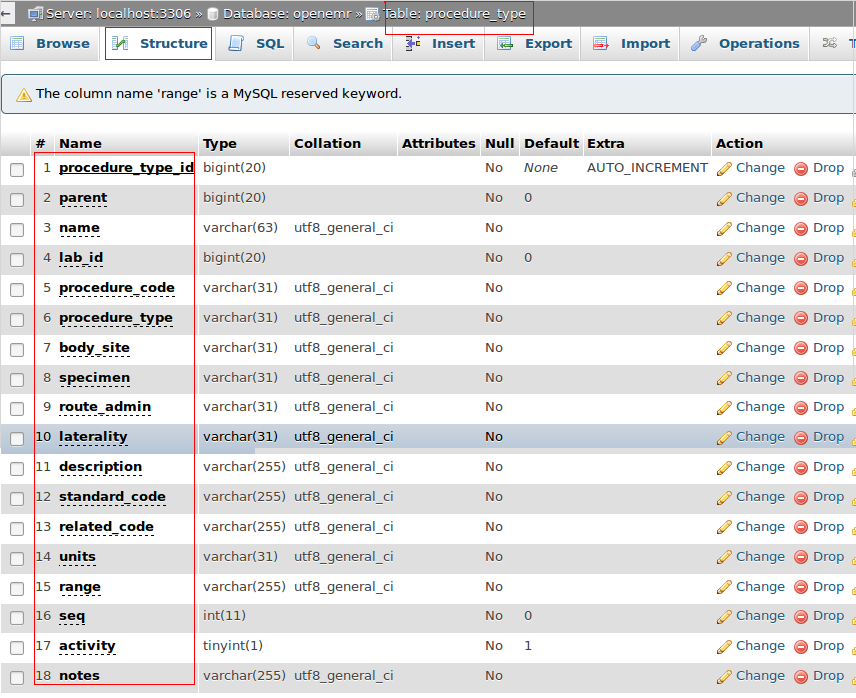
Understand the structure of the procedure_type table and the characteristics of each column.
Import
Navigate from the Menu to Administration/Other/Database. From the 4th page of the database, go to procedure_type, then to the Import tab. Browse for the unzipped file and click Go.
If all goes well, you should see the following.
Working in phpMyAdmin
From the Browse tab navigate to the last page, 72. Scroll to the bottom and follow the CO2 example to add Group and Discrete Result for a particular test.
Most users will find manual configuration easier to handle. The Graphical User Interface will become familiar after a few attempts. Working in phpMyAdmin requires more skills with a potential for damaging the database. Backup is strongly advised beforehand.
A safer way to accomplish this task is to load the .csv file into OpenOffice Calc or Excel after studying the CO2 example. The deletion of unwanted studies and the insertion of rows for Group and Discrete Result will be more in the user's comfort zone. If there are errors in the spreadsheet, the worse that will happen is the inability to re-import the file back into the database.
Procedure Order
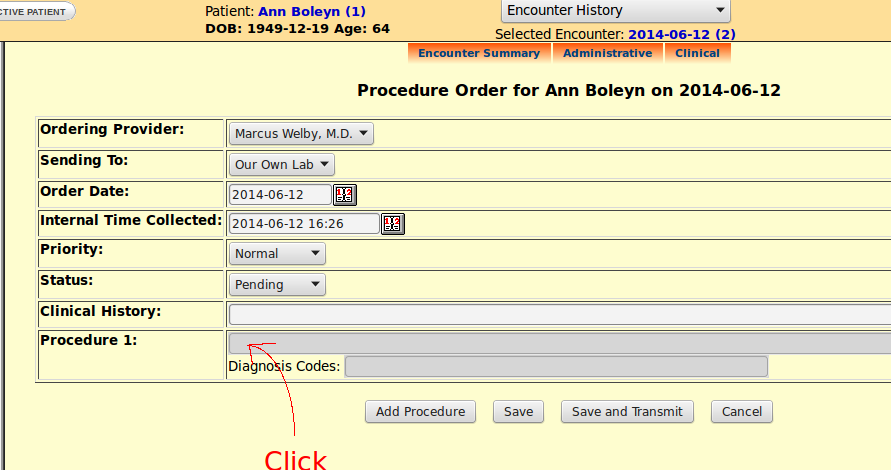
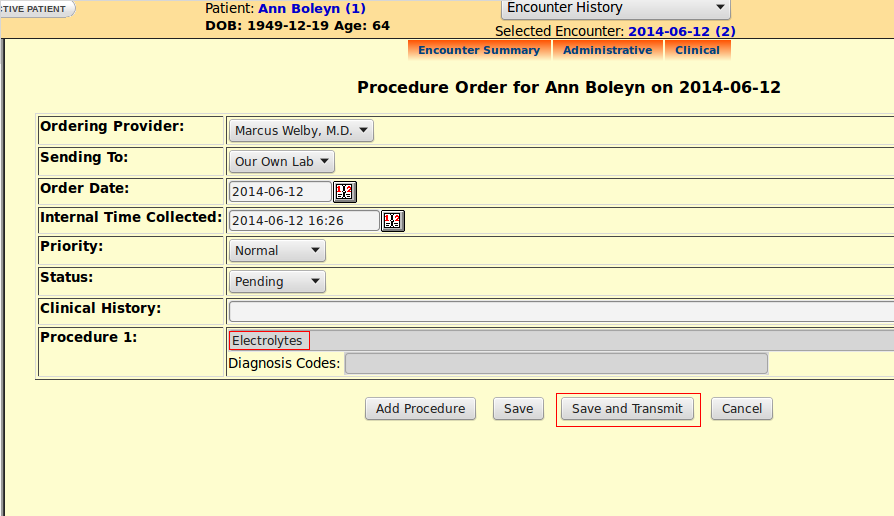
Create an encounter. From Administrative, choose "Procedure Order".
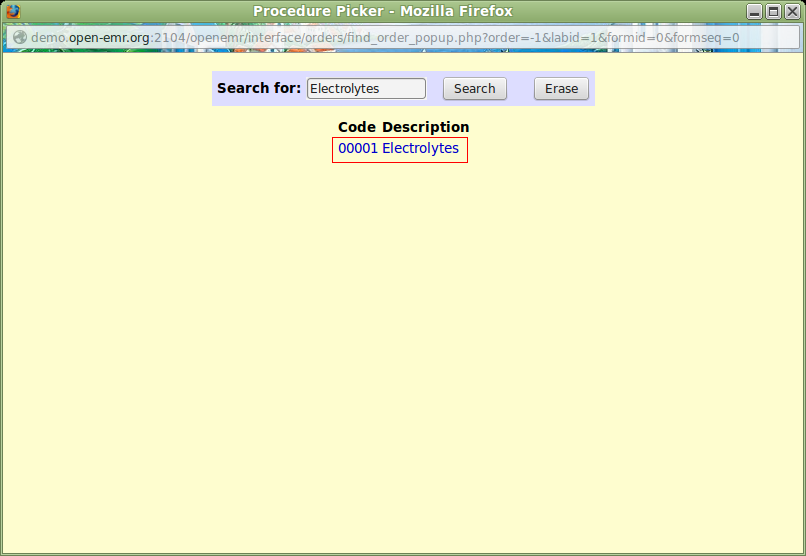
Click in the designated area to search for the diagnostic study.
Click the link to select the study.
Click "Save and Transmit".
Pending Review
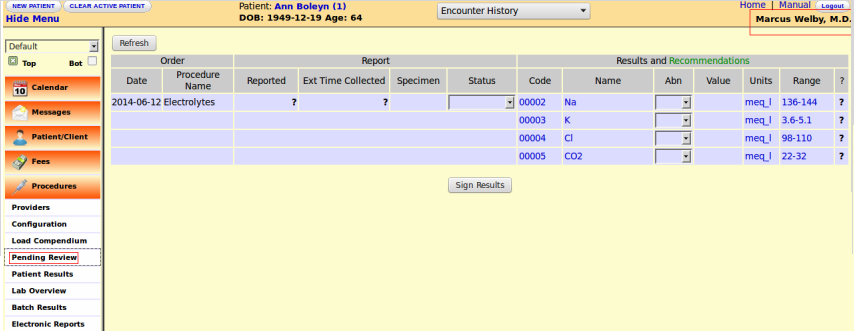
To bring up the studies for result entry, login as Physician. Other staff, including Administrator, will not have the ability to perform this task. Generally this privilege should be reserved for the Physician. The Front Desk should not be permitted to sign off on diagnostic studies.
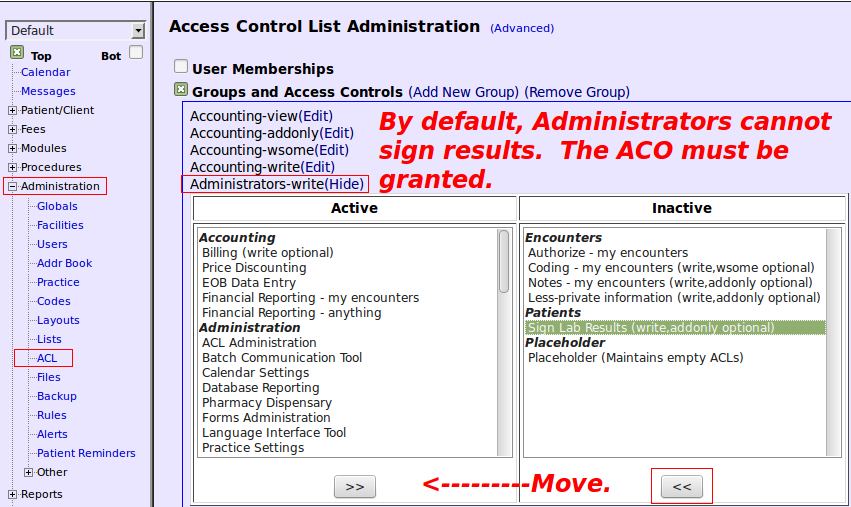
In unusual situations wherein the Physician wears two hats and has the responsibility of the Administrator as well, this can be changed in Administration/ACL by granting the Access Control Object, "Sign Lab Results", to the Administrator.
Add the Reported date, assign a Status and enter the results before clicking the "Sign Results" button.
Patient Results
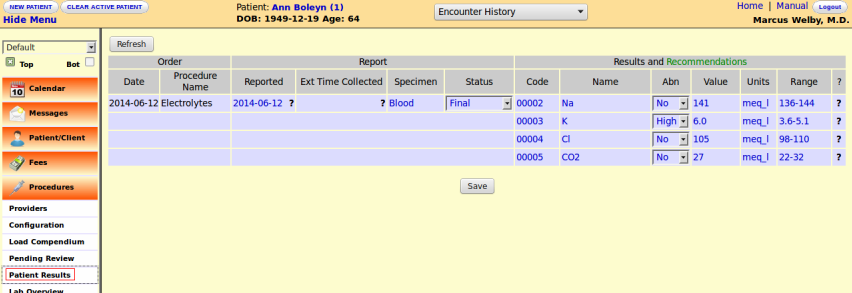
After signing the results, the data will appear in Patient Results.
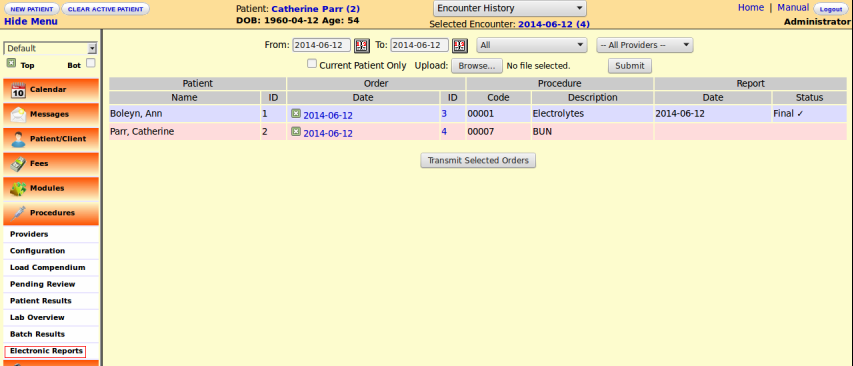
Electronic Reports
This can be used to look up studies for a particular day or period of time. It is an excellent tool to prevent a study from being forgotten. In a busy practice it is not unusual to overlook an ordered study; only to discover later, to the horror of the practice, that in addition to the abnormal result; that the timely processing of that result could have saved the patient from a delay in diagnosis and treatment.
Postscript
Configuration of the Procedures Module is a bit of a workout. Like all other aspects of OpenEMR, the more a physician masters; the greater his confidence and the deeper his appreciation of the magnum opus of the developers of this Project and all other Open Source projects as well.
Always frolick along the way.
