HOWTO: Change Search Columns in Patient Finder
Here's a quick HOWTO on modifying the search columns accepted by OpenEMR's Patient Finder search tool. The method works on all versions back to the 4.x's, though of course the pictures are different.
You need Administrator privileges to do this.
- Harley Tuck / MI-Squared
Yes, you can change the columns in the Patient Finder search tool located at 'Patient Finder / Client -> Patients'
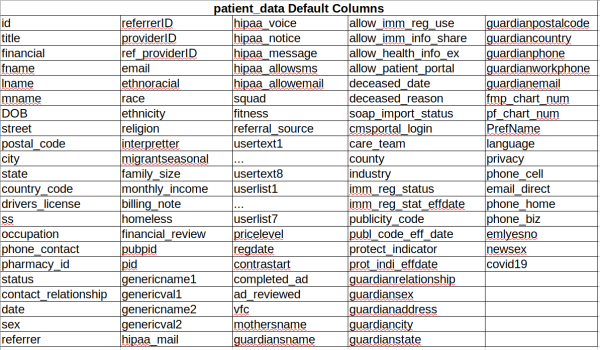
1) Decide which column(s) you want to include in your search tool. They must be among the columns of the 'patient_data' table in the OpenEMR database; no other tables can be used.
- See the table at bottom of this document or use your EMR's database management system to visualize the columns in the patient_data table.
For this demo we'll add 'postal_code'
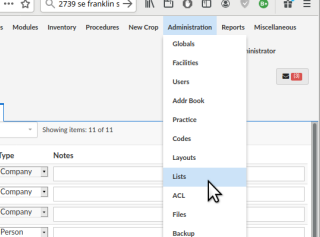
2) In main menu go to 'Administration-> Lists'
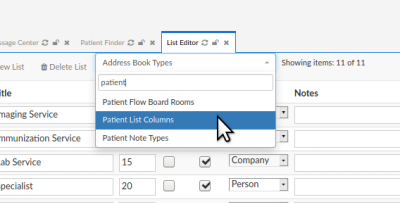
3). Select 'Patient List Columns'
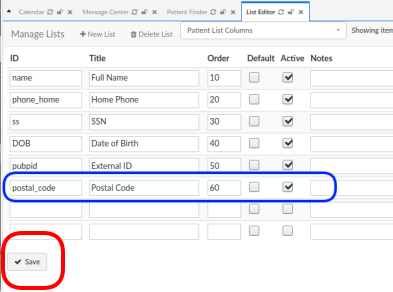
4) Add the new column
- Use the database column name in the 'ID' column
- The 'Title' is what you want the column name to be in Patient Finder.
- The 'Order' value determines where in the row of search result headings that item appears.
- Be sure the 'Active' checkbox is selected
- Alternately, remove all column data from unwanted entries
- Click 'Save'
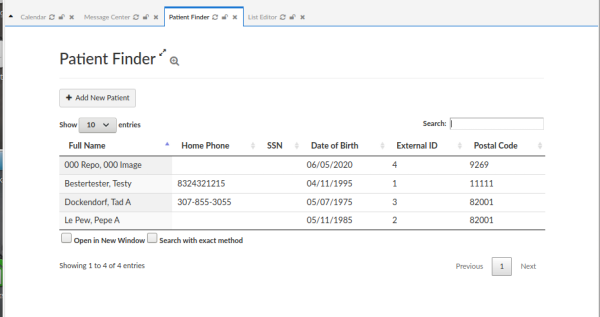
5) Search with your revised Patient Search tool.
- Note that when searching for partial terms, the fields match characters from left to right, not inside the datum. E.g., for 'Postal Code' you must search on '82' to get Tad and Pepe's zip codes; searching on '00' will only return '000 Repo [etc]'.
Table: patient_data default columns
The column names are virtually all the same or very similar to the labels of the Demographics text areas that contain their data.

