Comlink Telehealth Module Patient Instructions
For a draft version of these instructions you can download the following PDF Comlink Telehealth Module - Patient Instructions.pdf
Patient Instructions
Hello!
Your Healthcare Provider offers you the option to conduct Telehealth appointments, or video appointments over the internet. This document shows how to participate in Telehealth sessions, including how to request one, how to log into it and operate the controls in the session.
You will need a desktop or laptop computer; tablets and cell phones are also supported with some feature limitations.
Chrome browser is pictured in this document. Other browsers are supported but they will look different! And because many of the mobile phone screens look significantly different from the desktop screenshots, we have the ‘Mobile Appendix’ at the end of this document that shows screenshots from an Android phone running chrome.
A telehealth session consists of four steps
- Obtain the invite
- Launch the telehealth session
- Use conference room controls
- End the session.
Each of these steps will be described below.
1. Obtain The Invite
You will obtain an invitation either after you request a telehealth appointment through your portal account or by receiving it when the provider makes the appointment.
Request a Telehealth appointment
The Telehealth appointment is requested in the same way any appointment is requested.
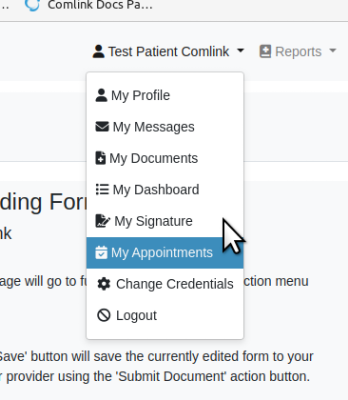
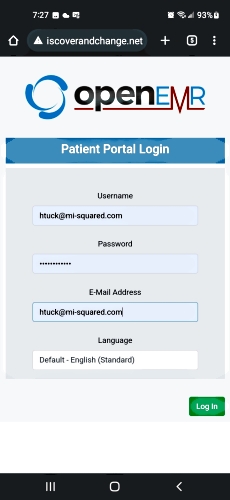
1. Log into your Portal account
2. Go to My Appointments
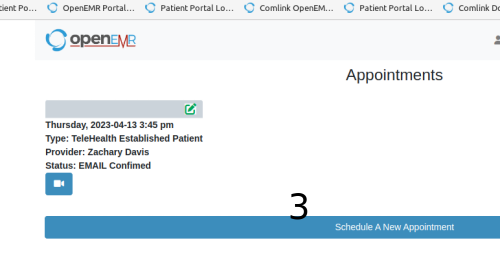
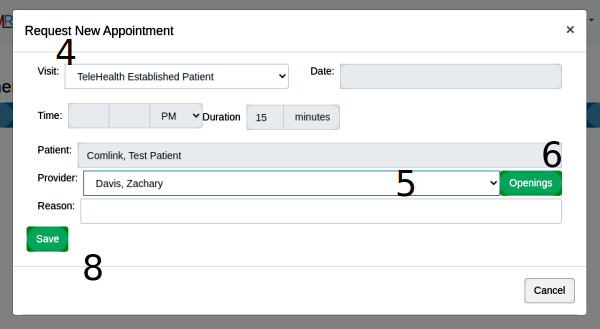
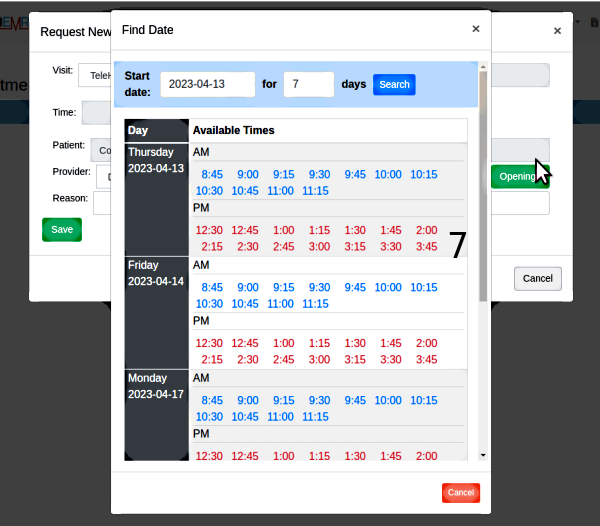
(See steps numbered in following pictures)
3. Click the blue ‘Schedule A New Appointment’ bar
4. Choose from one of the two Telehealth options for the ‘Visit’ dropdown (next picture)
5. Select the provider you wish to make an appointment with
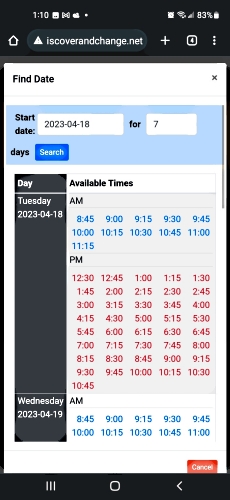
6. Click the ‘Openings’ button
7. Choose any of the available time slots (next picture below)
- If your provider has no openings no times will be listed
8. Click ‘Save’ button (in previous picture)
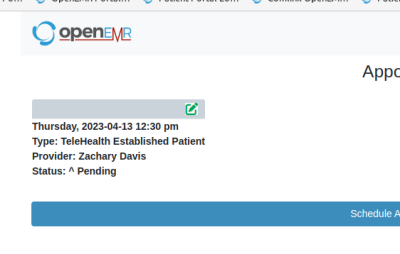
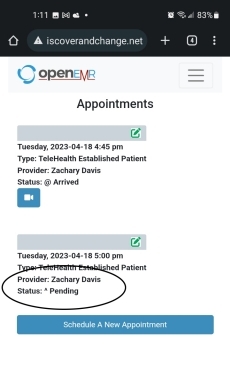
- In your list of appointments the new one will show as
‘Status: ^Pending’
until your clinic confirms the appointment
Receive an emailed invite
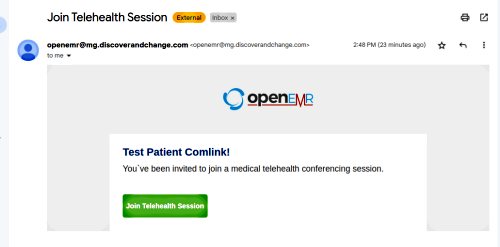
If your provider makes the appointment you’ll receive an emailed invite similar to the one below.
1. Click the green ‘Join Telehealth Session’ button
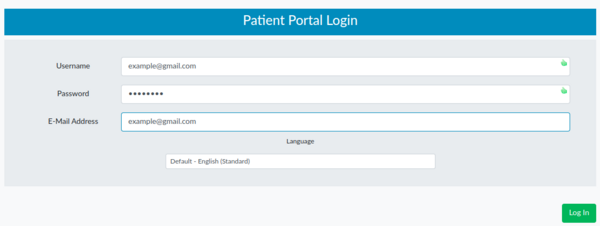
- Your browser will open to the Patient Portal login screen
2. Log into your patient portal
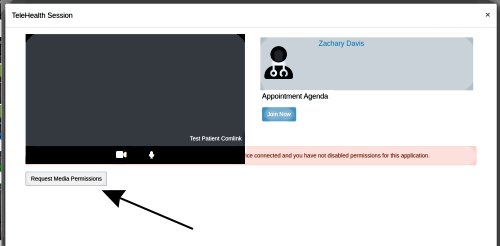
- The telehealth session may launch immediately
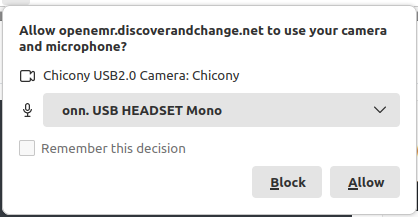
- Click the button to request permission to use mic and camera (arrow below)
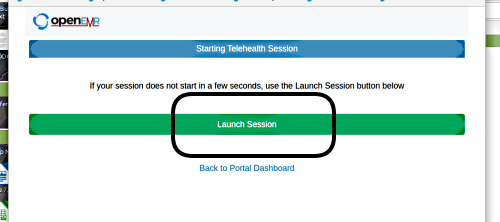
- If the session does not launch after a few seconds click the green ‘Launch Session’ bar.
2. Launch the Telehealth Session
If you do not have the emailed invite you may launch the session manually through your portal account.
1. Log into your portal account (see step 2 above) and open the Appointments tab2. Find the session you wish to launch
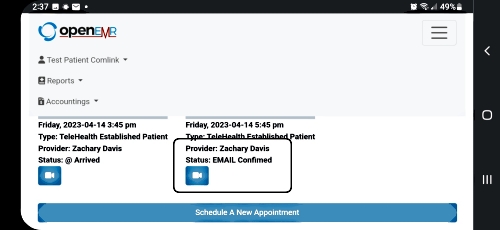
- The camera Icon shows the appointment status:
- Blue sessions are available to be launched
- Black sessions have passed the two hour launch window
- Green sessions are completed and can no longer be launched.
3. Click the blue video launch icon
4. Grant Access to your local microphone and camera
(your dialog will look different)
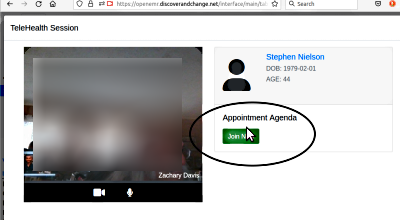
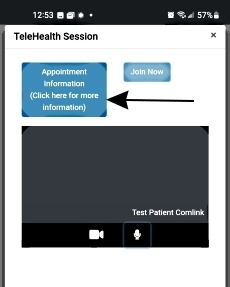
- When the provider starts the session the ‘Join Now’ button on your screen will activate
5. Click the ‘Join Now’ button (oval)
Use conference room controls
Once you join the session all the icons appear along the bottom of your session window.
Show or hide Room Controls
Controls disappear after five seconds of inactivity. Move the cursor to display the controls again.
Enable / Disable Video
Click to toggle camera off or on.
Enable / Disable Microphone
Click to toggle mic off or on.
Click the share screen icon
- This icon only appears after joining an active session
- Does not appear when using a tablet or mobile phone
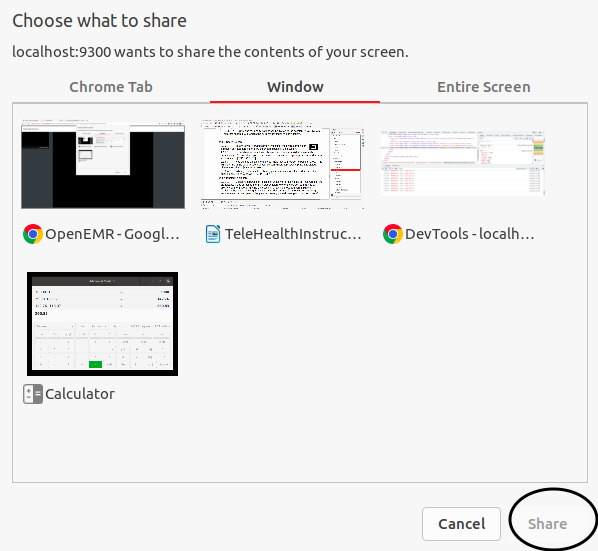
1. Click on the the screen you wish to share
2. Click ‘Share.’ (oval lower right)
3. To stop sharing click the blue ‘Stop Sharing’ button at the bottom of the window
4. End Telehealth Session
1. Click the hang-up button
2. Click ‘Confirm’ (not pictured)
A few notes:
- If you leave the session before the provider closes it, you can sign back in by manually re-opening the session as shown above in step 2, ‘Launch Telehealth Session’
- One other participant at a time may be invited to join the session. Just tell your provider during the session and they can bring them in.
Mobile Appendix
Mobile phones have several layouts that are significantly different from the desktop screens.
- The screens will rotate if your phone is configured to do so, but may not show all the features in some orientations
- To save space in this document the pictures will have ‘unused’ space cropped off of the picture
- These pictures follow the instructions given above for desktops, but with fewer details
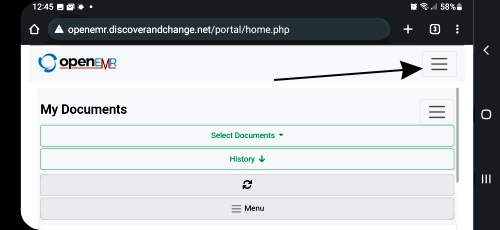
Initial portal screen – click the upper ‘hamburger’ to see menu
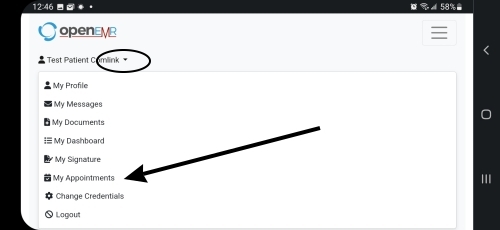
Click dropdown next to name (oval)
Select ‘My Appointments’ (arrow above)
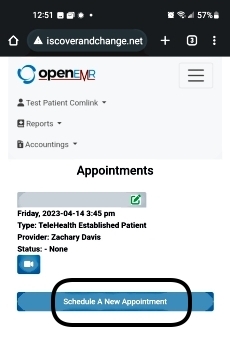
Make an appointment request: click the bar (below)
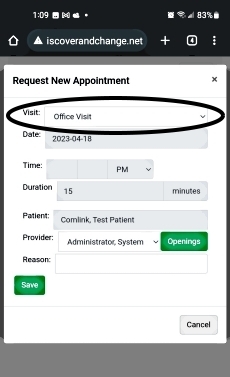
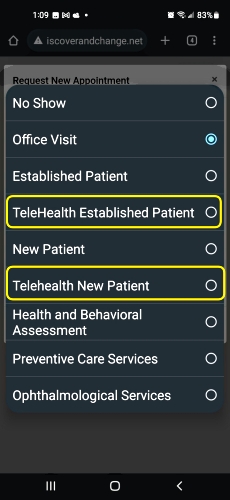
Click the ‘Visit Type’ dropdown
Select one of the Telehealth visits- make sure it does not remain the default ‘Office Visit’
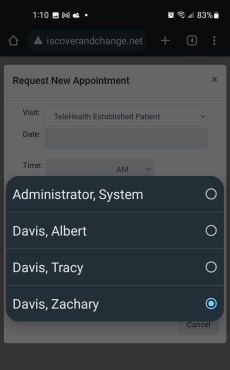
Select the provider you want to see
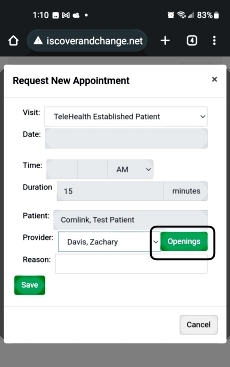
Click ‘Openings’ to select the time
Select the preferred time
The new appointment request appears as ‘^Pending’ (oval)
When starting the session go to your portal appointment list
Click the desired appointment’s blue icon
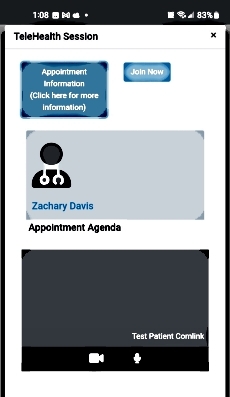
This is the basic session window
- click the ‘Appointment Information’ button (arrow) to open agenda window
The rest of the screens have a layout similar to the desktop screens if held upright. Holding sideways may cut screen controls off the bottom edge.
