Install Translations
From OpenEMR Project Wiki
Overview
These are instructions to upgrade to the most recent language translation tables published for OpenEMR. This is very simple to do.
- Note that this will delete all of your current local OpenEMR language translation tables if you are using a OpenEMR version less than 4.0. (Since version 4.0, there is a lang_custom sql table that holds your local customizations, and is described at the end of the tutorial)
Development Translation Releases
- Daily Development Release: This is automatically built daily (17:00 Pacific Standard Time) from the google docs translation spreadsheet; note it could be buggy.
Official Translation Releases
- 08/20/2009 Release: This was released with OpenEMR 3.1.0 and included only selected languages (English, English(Indian), Swedish,Spanish,Dutch,Chinese,Greek).
- 10/24/2009 Release: Includes all languages.
- 12/11/2009 Release: Includes all languages.
- 12/19/2009 Release: Includes all languages.
- 01/23/2010 Release: Includes all languages.
- 01/30/2010 Release: Includes all languages.
- 02/12/2010 Release: This was released with OpenEMR 3.2.0 and includes only selected languages (English, English(Indian), Dutch, Greek, Portuguese (Brazilian), Portuguese (European), Spanish, and Swedish).
- 03/20/2010 Release: Includes all languages.
- 04/24/2010 Release: Includes all languages.
- 07/21/2010 Release: Includes all languages.
- 08/23/2010 Release: Includes all languages.
- 09/06/2010 Release: Includes all languages.
- 03/05/2011 Release: Includes all languages.
- 03/12/2011 Release: Includes all languages.
- 03/20/2011 Release: This was released with OpenEMR 4.0.0 and includes only selected languages (English, English(Indian), Dutch, Greek, Portuguese (Brazilian), Portuguese (European), Spanish, and Turkish). (new)
Installation instructions
1. Download the translation (choose a link above) release to desktop (via 'File'->'Save Page as'):
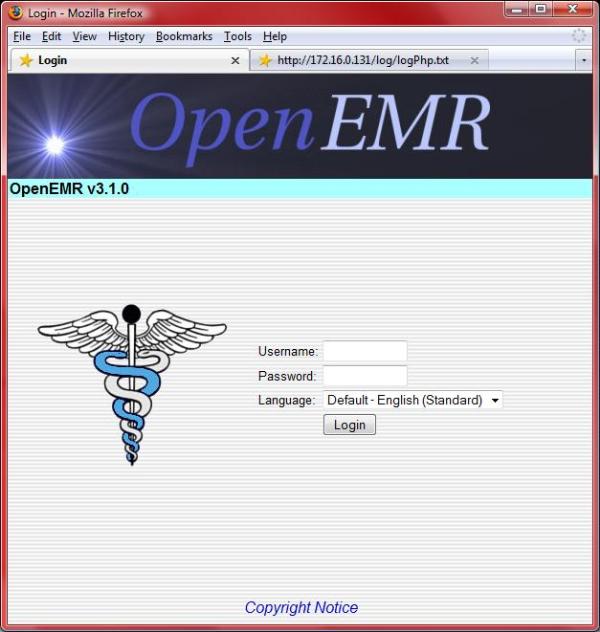
2. Login to OpenEMR:
- Login. (screenshot below)
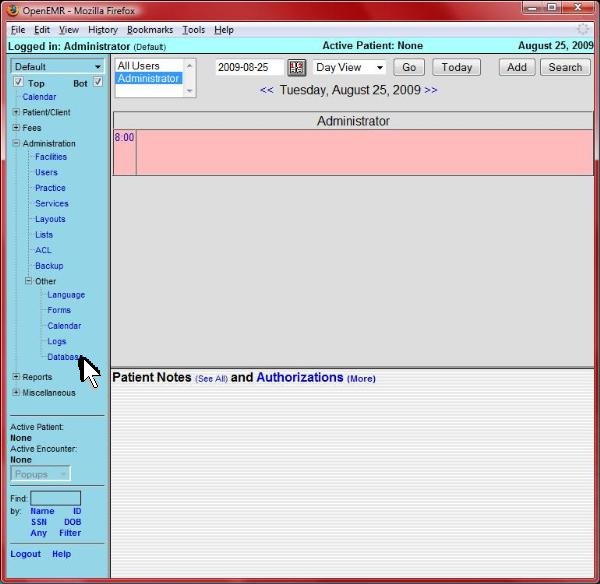
- Click 'Administration'->'Other'->'Database' from left tree menu. (screenshot below)
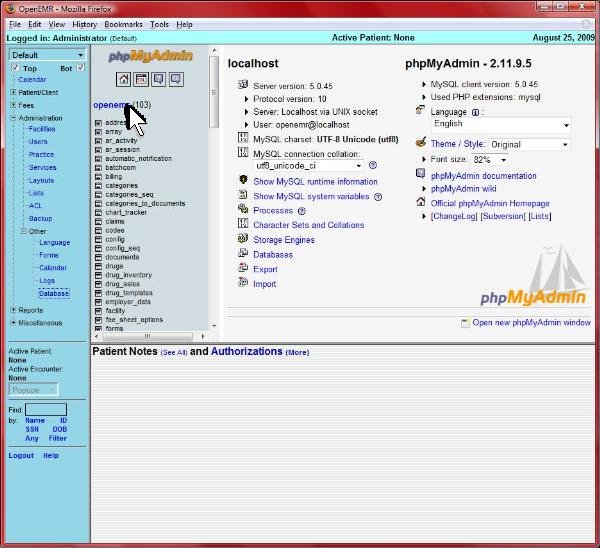
- Click 'openemr' database link near top left (highlighted by arrow). (screenshot below)
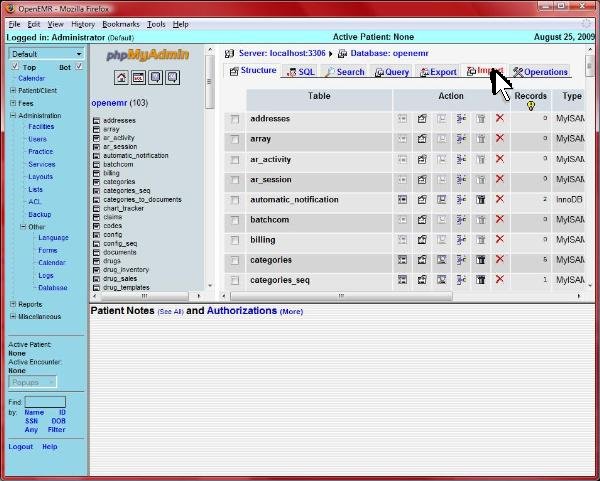
- Click 'Import' near top right (highlighted by arrow). (screenshot below)
- Click 'Browse' (highlighted by arrow). (screenshot below)
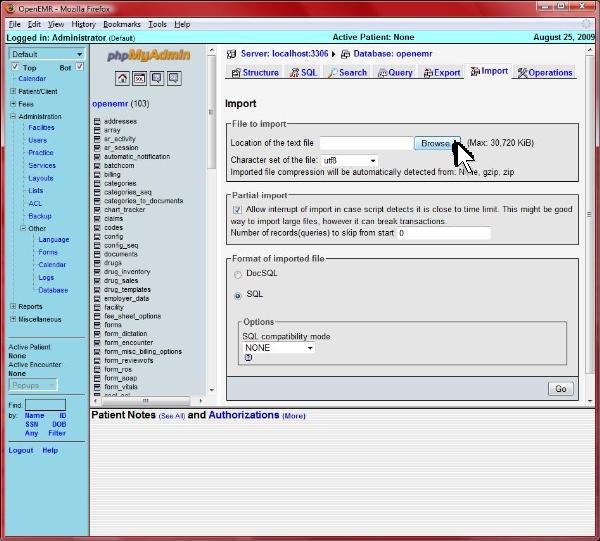
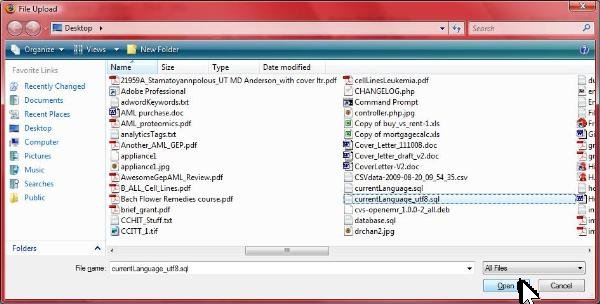
- Select the 'currentLanguage_utf8.sql' (or languageTranslations_utf8.sql) file that you downloaded in above first step, and click 'Open'. (screenshot below)
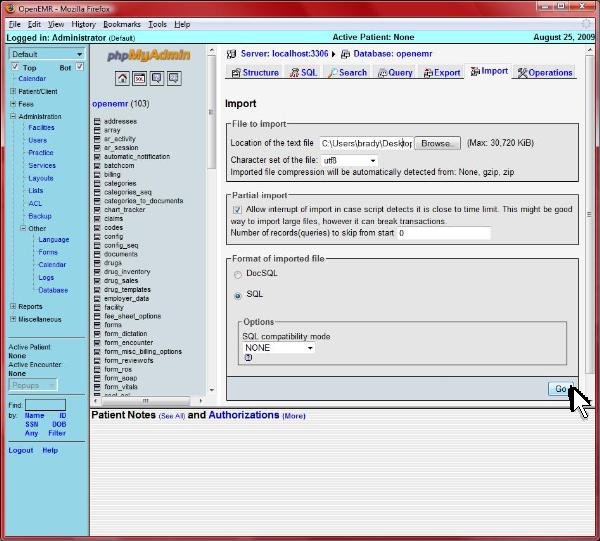
- Click 'Go' at bottom right (highlighted by arrow). After click, the import can take up to a minute or so. (screenshot below)
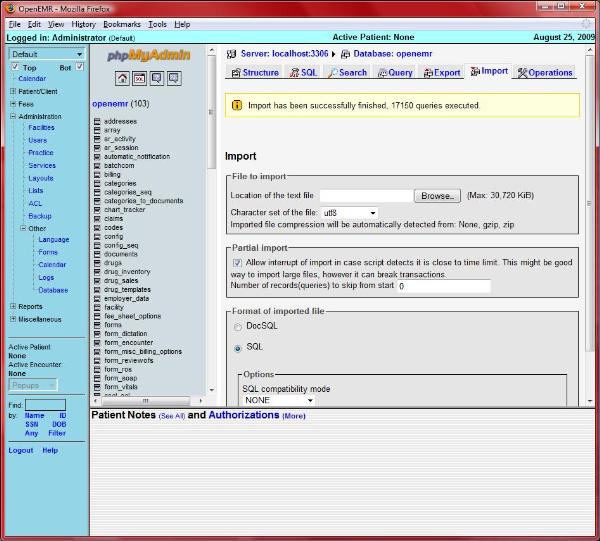
- After import is done, you should see the yellow banner stating the import has been successfully finished. (screenshot below)
- The last thing to do is to synchronize your custom translations. (Note that all translations and constants that you have added via the Administration->Language editor are saved in a sql table entitled lang_custom; this allows you then to add these back after importing the standard set of tables above). To do this, go to Administration->Other->Language, click 'Manage Translations' at the top, and then click the 'Synchronize' button.