HOWTO Activate a Patient's portal access - v6.0
Introduction
OpenEMR's patient portal capability has come in several configurations and been called many things over the years (and in older documentation). Currently, it is called 'The Patient Portal', or possibly the 'Native Patient Portal' to differentiate it from the 3d party portals that one might find added to OpenEMR.
The Patient Portal has received significant updates since the main v4.2 documentation and the supplemental 5.0 features. It seems about time to issue a complete re-write of the basic instructions of how to activate the portal and sign up a patient from inside OpenEMR, showing the v6.0 interface.
This doc borrows heavily from the 'Native Patient Portal' section of Patient Portal (all hail SherwinGaddis !) with some new features added.
- HTuck MI-Squared
Procedure
High-Level View - the main steps of this process:
- 1. Activate portal in OpenEMR Globals - it needs to be turned on
- 2. Authorize patient in OpenEMR: This is patient-specific.
- 3. Create patient login credentials
1. Activate portal in OpenEMR Globals
This document only discusses how to activate an individual patient's portal access but that depends on having an active portal. See configuration details in the section, 'Activate The Portal' in The OpenEMR 6.0+ Patient Portal Overview.
2. Authorize patient in OpenEMR
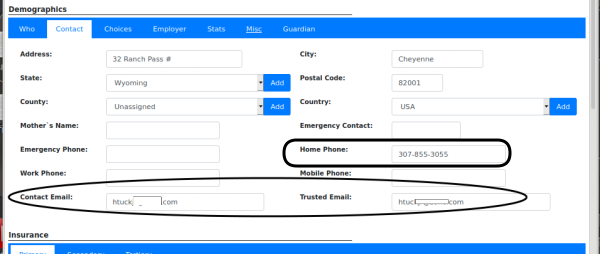
Multiple Demographics settings must be correct for a patient to use the patient portal. Note, the starting state of patient unauthorized for the portal:
tab: Contact
- Home Phone (round rectangle below)
- Contact email and Trusted email (oval) - depending on the EMR's patch version both of these need to be provided. They may be the same.
- Click 'Save' if changes were made
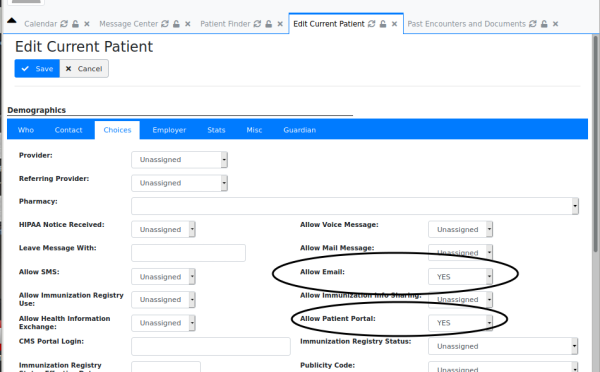
tab: Choices
- Allow email - YES
- Allow Patient Portal - YES
- Note: In order for the patient to be emailed their portal login credentials an email address needs to be set in Administration->Globals->Notifications->'Patient Reminder Sender Email' (not pictured) and the SMTP server needs to be set up. See instructions for that elsewhere.
- Click 'Save' if changes were made
3. Create patient login credentials
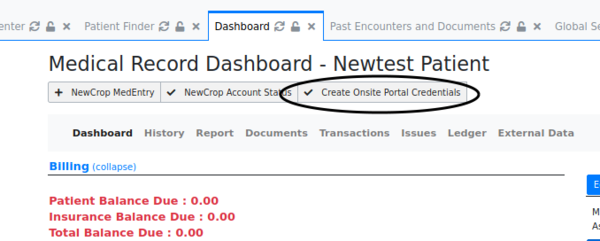
In dashboard screen:
- The portal button has changed to 'Create Onsite Portal Credentials' (oval below)
- Click it
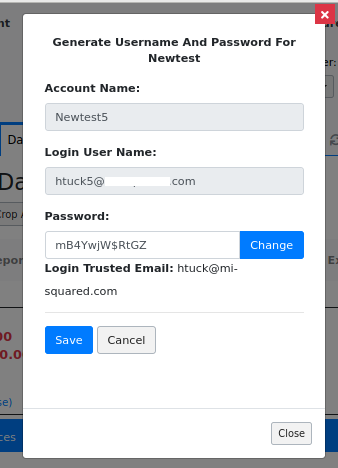
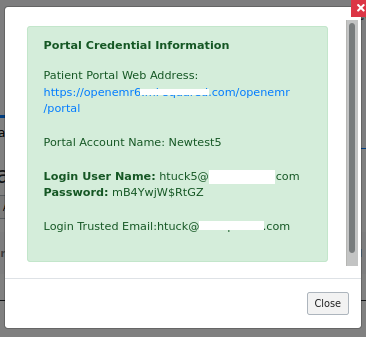
- Note the login is a numbered variant of the trusted email username.
- A print dialog opens to print the credentials-- not pictured since its appearance varies by computer system.
- Print it, or close the print dialog to see the credentials:
At this point, you may surf to the portal URL as shown in the globals setting for 'Patient Portal Site Address ', the first image in this document.
NOTE: If using the same browser to log into the portal as you are using to create the portal account,
it would be prudent to close the EMR before trying to log into the portal.

