HOWTO: Create and Delete Recurring Calendar Events
HOWTO: Create and Delete Recurring Calendar Events
Introduction
The OpenEMR calendar allows creation of recurring events, which are seen on the event editor by the user as calendar categories on the Provider tab and patient appointments on the Patient tab. These events repeat at a configurable interval in both the patient’s appointment calendar and the provider’s schedule. The steps to create calendar categories and appointments are the same; they simply take place in the Patient or the Provider tab of the calendar event editor. Also, the steps are the same as creating a regular, non- recurring appointment/ category with the single exception of filling out the ‘recurring’ criteria. But some other information is critical to know about the workflow, hence this HOWTO.
This document shows the OpenEMR demo v7.0.1(1) but these same steps apply as far back as v5.
Create the recurring event:
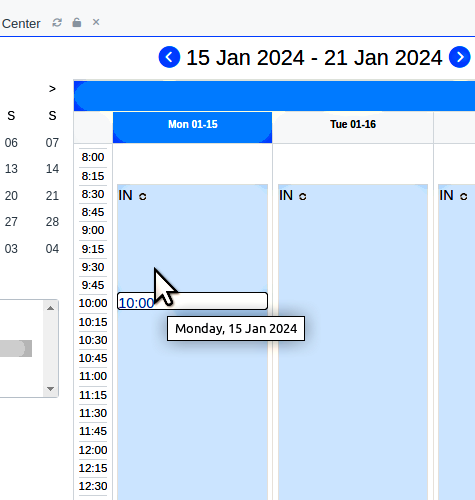
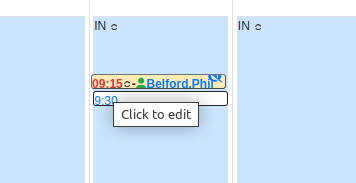
Click on the numbers of the time in the date of the first time that the recurring event is to occur.
- The time is a link; look for the mouse pointer turning to the hand indicating it’s on a link
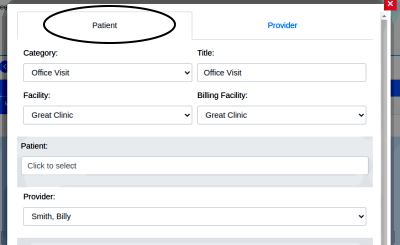
- In the event editor, if making a Patient appointment use the ‘Patient’ tab and enter any information not automatically filled in:
- Category
- Facility
- Billing Facility
- Patient
- Provider
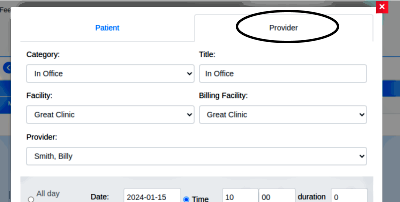
- If making a provider schedule event use the ‘Provider’ tab and enter any information not automatically filled in:
- Category
- Facility
- Billing facility
- Provider.
Configure the recurring settings
Yes, the events panel is very confusing for creating repeating events.
You may use ONE of the two methods:
- The ‘Repeats’ checkbox
/OR/
- Select the days of the week to repeat.
‘Repeats’ Checkbox
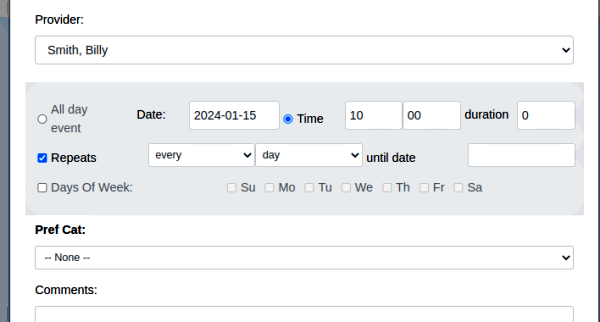
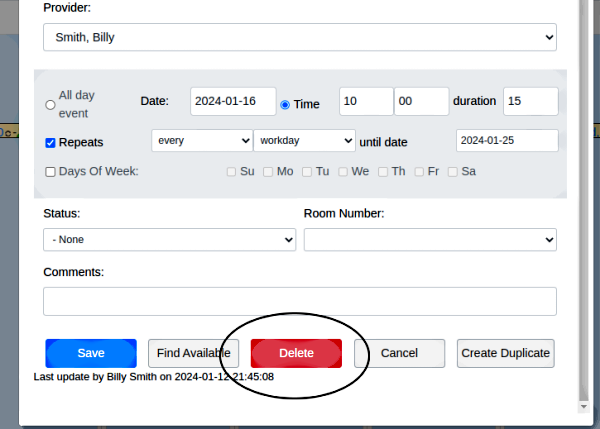
1. Click ‘Repeats’ checkbox which activates the ‘Date’, ‘Time’ and ‘Duration’ text areas, and the ‘Repeats’ criteria dropdowns to its right.
- The Date, Time, Duration of the recurring appointments will be automatically taken from the calendar’s event category selected in step 1 above
- Set any event criteria that are not pre-configured
- Or change the criteria if desired
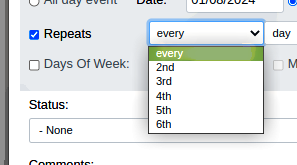
2. Dropdown ‘Repeats:’: * leave as ‘every’ or select
- ‘every 2nd’, -’ 3d’ etc
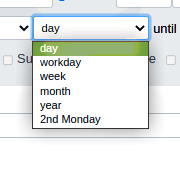
3. Dropdown ‘Day:’ :
- leave as ‘Day’ which makes it every day of the week
or select: - Workday - restricts it to the days and times configured on this provider’s calendar as ‘In/ Out of Office’. If the time is not configured as ‘In Office’ you will be asked if you want to use it anyway.
- Week – this same day each week
- Month – this date every month
- Year – this date every year
- 2nd Monday – the calendar sees that in this example we are using the 2nd Monday of the month. If we use a different day it would determine which day of the month it was and display that as the choice.
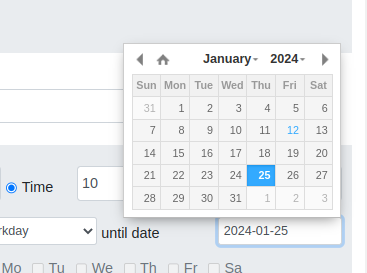
4. ‘until date’ : click in the text area to open the calendar widget to set the end date of the event series.
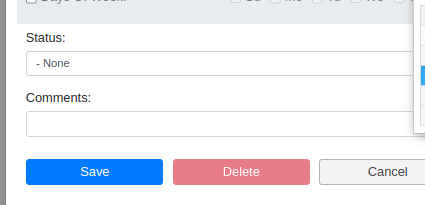
- Set status, comments etc as for a regular appointment/ event.
Click ‘Save’...
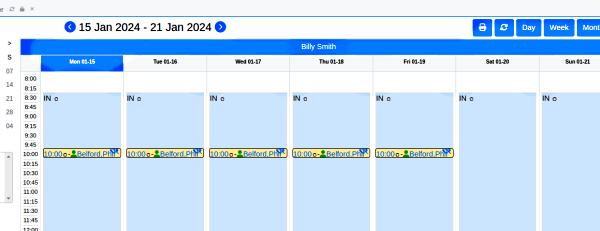
...and see the recurring event on the monthly calendar
Select Days of the Week
1. Instead of selecting the ‘Repeats’ checkbox, select ‘Days of the Week’* the ‘Date‘ will contain the current event date
- the other text areas will contain the default values for that event category
- Select the checkboxes of the days of the week this event will occur on
- Click the ‘until date’ text area and use the calendar widget to set the end date of the series
- Set status, comments etc as for a regular appointment/ event.
- Click ‘Save’
And see the recurring event on the monthly calendar.
Delete the recurring event
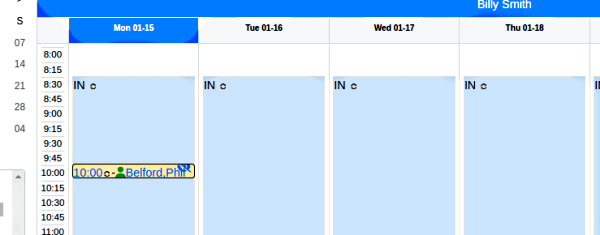
1. Locate any entry for the recurring event that you want to delete
- here we’re deleting just part of the series
- the time is a link; the pointer should change to a hand when it is on the link (not shown)
2. Click the event time to open the event dialog
3. Click red ‘Delete’ at bottom
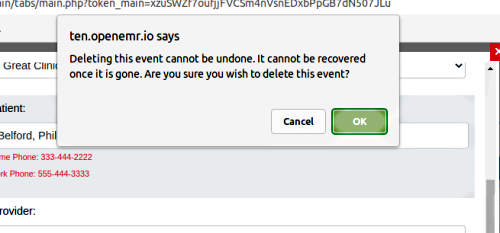
4. Warning appears; click ‘OK’
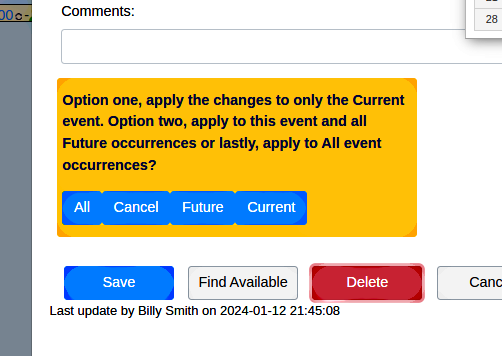
5. Click on the button for the degree of event deletion (image below)
- The descriptions in the yellow box are in different order than the buttons...
- All – delete all occurrences of this event, past and present
- Cancel – cancel this deletion process
- Future – delete the event on the selected date and all future instances of this event.
- Current – delete only the currently selected date of this event
6. Click ‘Future’
...and see the selected date and future dates are removed from the calendar.
Conclusion
- See other wiki documentation for how to create single- occurrence calendar events.
Very old but still useful for general appointment making:
- A configuration step that is frequently missed is when new calendar event categories are created (on OpenEMR v7, at Admin/ Clinic/ Calendar – Categories). The sequence number is often left at ‘0’ but since that value determines where in the dropdown the calendar looks for the category data, having duplicate sequence numbers can confuse the system.
One convenient way to handle this is to make the sequence number the same as the category number, unless you haver a different unique value to assign.
