Use the Carecoordination module
Purpose
This document shows how to use the CCDA module as found in OpenEMR 4.2.x: creating a CCDA file for an existing patient; creating a new patient by importing a CCDA file and importing CCDA data for an existing patient.
Introduction/ Caveats
This document shows the workflows used in a testing environment so may not exactly duplicate all aspects of clinical use. But they should be close.
This summary shows how to perform three activities:
- Create a CCDA from an existing patient record
- Create new patient from CCDA file
- import existing patient data from CCDA
Refer to the wiki page Z&H's CCDA Module to get the module ready to use. An OpenEMR Administrator's user account is required for these activities.
Many thanks to Z&H Healthcare for contributing the CCDA module and to Brady Miller for most of the original instructions used to create this tutorial.
- HTuck – MI-Squared
Procedures
Create a CCDA from an existing patient record
- For testing, we created a 4 yr old patient to be sure some Clinical Remindedrs would be activated.
- Ensure that an encounter exists for any patient whose record is being exported to CCDA
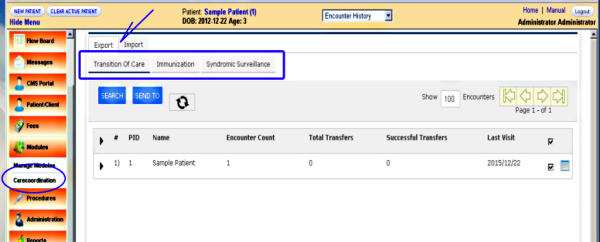
- 1. On left Nav Menu:
- 'Modules→CareCoordination' (left oval)
- 2. Click 'Export' tab (top arrow)
- 3. Select the type of CCDA to produce (top rectangle)
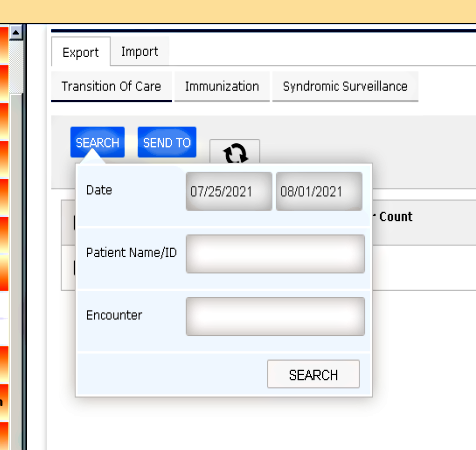
Alternatively you may click the 'Search' button and search by:
- encounter date range
- pt name/ id
- encounter number
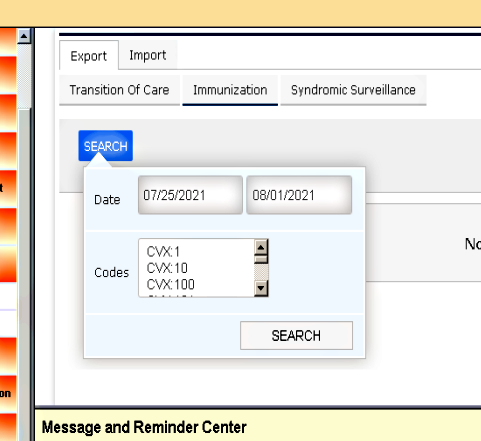
Export Immunization CCDAs
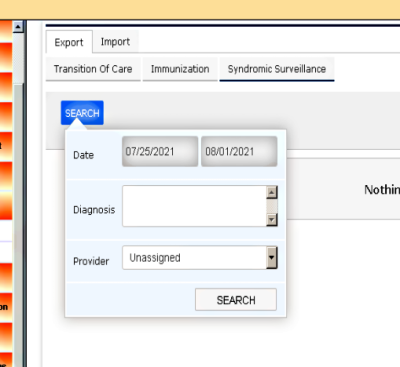
Syndromic Surveillance CCDA
- 4. Generate the patient listing with the 'Search' button
- 5. Select the checkbox at right end of the patient listing (circle)
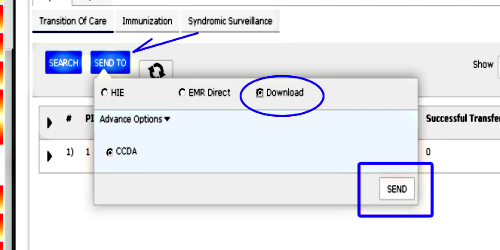
- 6. Click "Send To" button (arrow)
- 7. Download panel opens; select 'Download' (oval)
- 8. Click 'SEND' button (rectangle)
After OpenEMR processes it you will be able to download the CCDA.zip file according to your OS/ browser method (not pictured).
Import external CCDA file
When you receive a CCDA file you may create a new patient with it or merge the information in it with an existing patient's record.
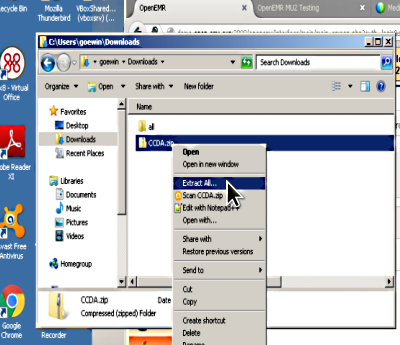
- 1. When you receive an external CCDA file place it in a known location e.g., Downloads or some purpose- made directory/ folder (MS Windows 7 system pictured)
- 2. Find and unzip the incoming CCDA.zip file.
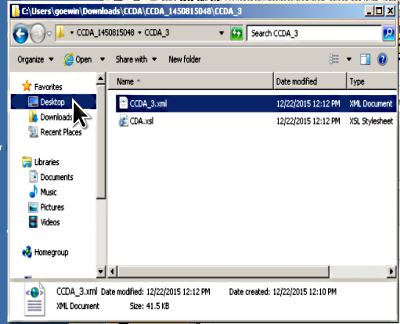
- 3. Locate where it was extracted to.
Buried two directories (folders) deep in the extracted content is a file "CCDA_[number].xml" with a "xml" extension (NOT the xsl one).
It may be convenient to move this xml file to a more accessible location e.g., your desktop or Downloads.
Back to OpenEMR to create a patient from the CCDA xml data.
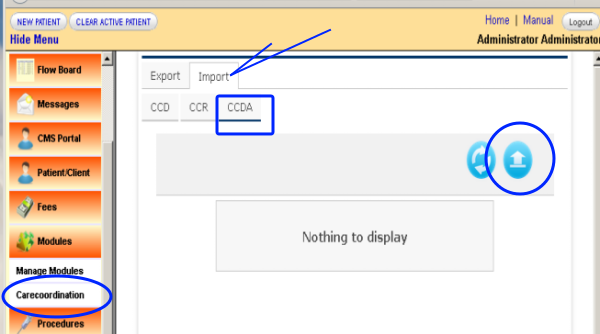
- 4. In left nav menu: 'Modules → Carecoordination' (left oval below)
- 5. Click 'Import' tab (arrow)
- 6. On Import tab select new 'CCDA' subtab (rectangle)
- 7. Click the upload file icon (right circle)
- 8. Use your browser dialog to locate and select that xml file from step 3 above (not pictured)
- Icons at right of line allow various treatments of the incoming file.
- Click the very left triangle (below) of the patient line for read- only display of all the health information in the CCDA
Add as new Patient
Precisely that.
- 9. Click the head icon (oval at right)
- 10. Agree to "Add as new patient" (dialog not pictured)
It is done.
Alternatively, the other icons allow you to review or edit the CCDA information before adding the new patient.
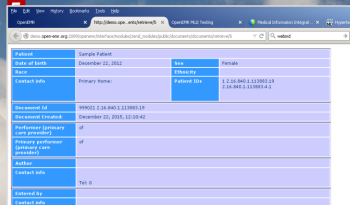
View Details
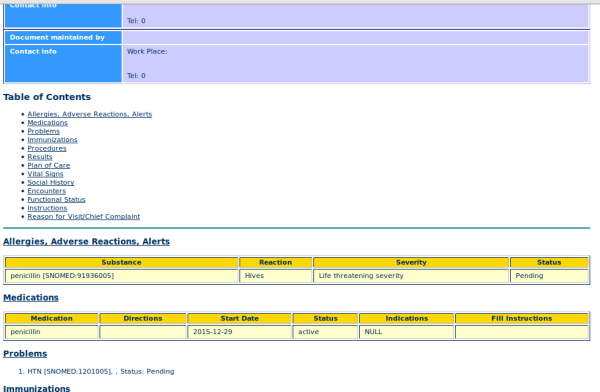
Produces a two part printable html display of the CCDA data.
The top is CCDA document identifiers/ metadata
The bottom is the CCDA data.
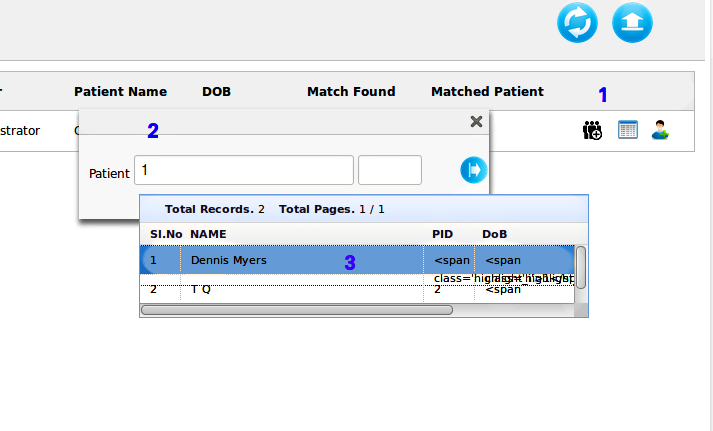
Merge to any patient
This icon appears when the incoming patient does NOT already exist in the system. CCDA data may be merged into the record of any other existing patient.
- 1. Click icon and the Merge panel appears
- 2. Enter the existing patient's PID in merge panel
- 3. Select from list of possible matches
Review and Approve
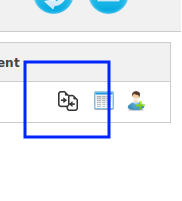
This icon appears when the patient already exists in the system.
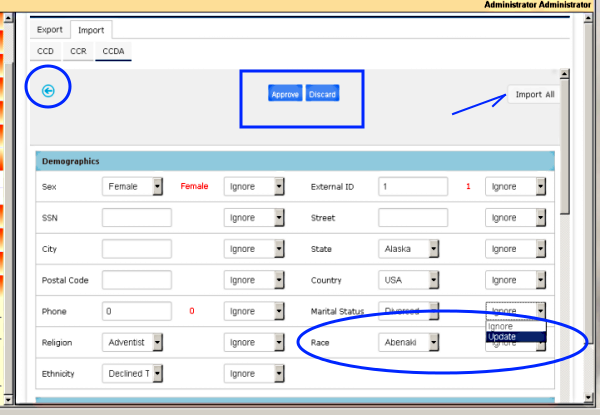
It allows you to review, edit then accept incoming data.
- Edit an entry and select 'Update' in the dropdown (oval lower right below)
- 'Import All' button stops edits at their current state preventing further changes (arrow top right)
- 'Accept' or 'Discard' buttons (rectangle top center) takes the changes into the patient record or rejects the CCDA import.
- Back arrow (circle top left) lets you navigate back to the main import screen.
