Patient Portal Sigs
Introduction
This is the mechanism by which staff may graphically sign forms submitted from the portal by patients. If you want to simply edit your ‘Signature On File’ you can go in through the Portal Dashboard and do that. Otherwise the signature dialog will appear and you can do these steps whenever you click the 'X' to sign a document in a portal audit.
Signature Workflow
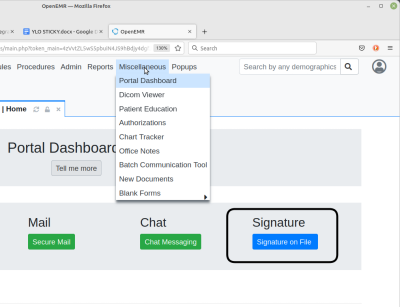
0. Arrive at the Portal Signature screen in the expected manner: from main menu click ‘Miscellaneous/ Portal Dashboard’ then click the 'Signature' button
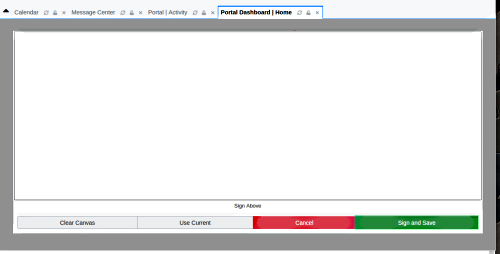
The initial signature dialog display will be empty, whether you have a signature on file or not.
Enter Signature
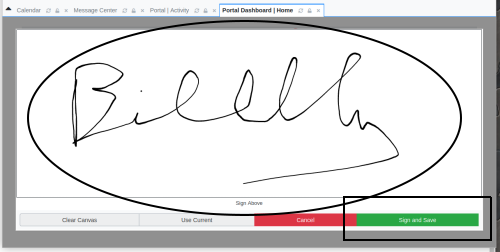
1. Left-click the mouse in the 'Sign Above' text area (oval below) and, keeping the left mouse button pressed, draw your signature in the box.
2. Click green button 'Sign and Save' (rectangle lower right) and the dialog will disappear.
Edit Your Signature
1. Open the Signature dialog
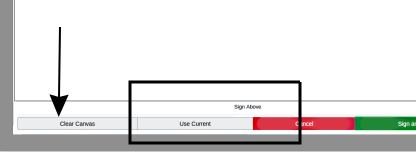
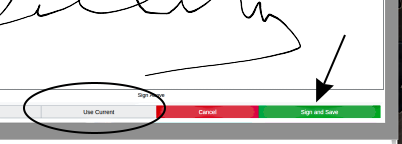
2. Click 'Use Current' to display the signature (square below)
3. Click 'Clear Canvas' (arrow)
4. Enter your signature
5. Click 'Sign and Save'
Sign A Dococument
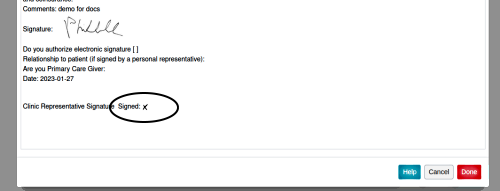
When a staff is doing audits and opens a document that requires a staff signature they click on the x to sign (oval below)
The (blank) signature dialog appears as shown previously.
1. Click 'Use Current' to display the current signature (oval below)
2. Click green button 'Sign and Save' (arrow)
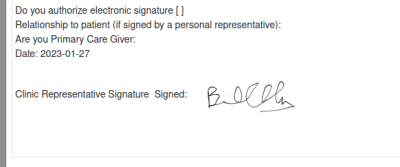
3. The document will appear with the signature in place.
4. Click red 'Done' button at bottom right of form...
5. ...and at top of window, click 'Chart to Onsite Portal Reviewed’ (‘a’ in pic below)
Conclusion
The Portal Dashboard’s ‘Signature on File’ function can only be applied to portal templates that are written to require a graphical signature. However, once a template document is signed the signature will appear on it when it’s moved to other parts of the Patient’s Documents repository.
