Install Translations
From OpenEMR Project Wiki
Revision as of 07:49, 18 January 2021 by Bradymiller (talk | contribs) (→Official Translation Releases)
Overview
These are instructions to upgrade to the most recent language translation tables published for OpenEMR. This is very simple to do.
- Note that this will delete all of your current local OpenEMR language translation tables if you are using a OpenEMR version less than 4.0. (Since version 4.0, there is a lang_custom mysql table that holds your local customizations, and instructions to synchronize your custom local translations with the standard translation tables are described at the end of the tutorial below.)
Development Translation Releases
- Daily Development Release: This is automatically built daily (8:10 AM Pacific Standard Time) from the google docs translation spreadsheet; note it could be buggy.
Most Recent Official Translation Release
- OpenEMR 6.0.0 Release: This was released with OpenEMR 6.0.0
Installation instructions
1. Download the translation (choose a link above) release to desktop (via 'File'->'Save Page as'):
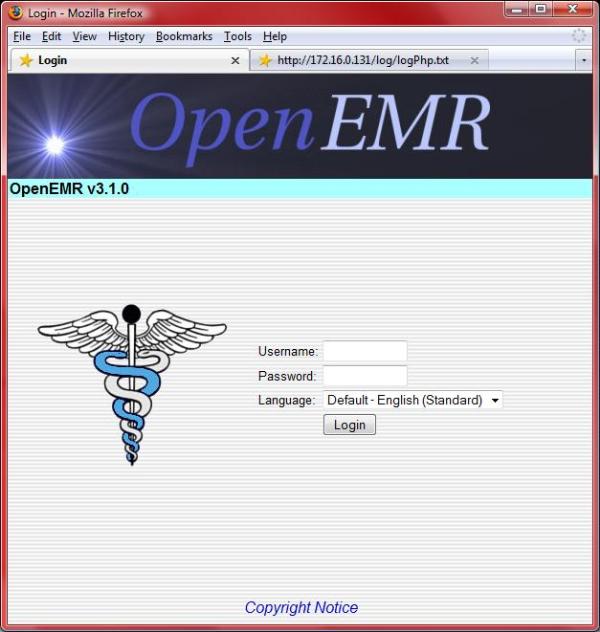
2. Login to OpenEMR:
- Login. (screenshot below)
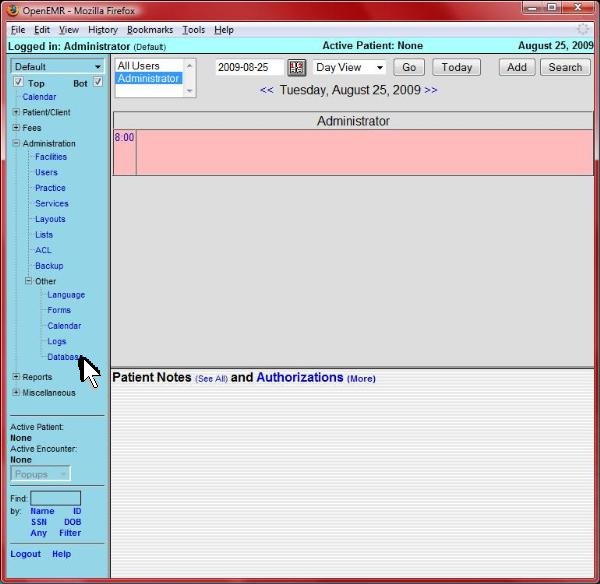
- Click 'Administration'->'Other'->'Database' from left tree menu. (screenshot below)
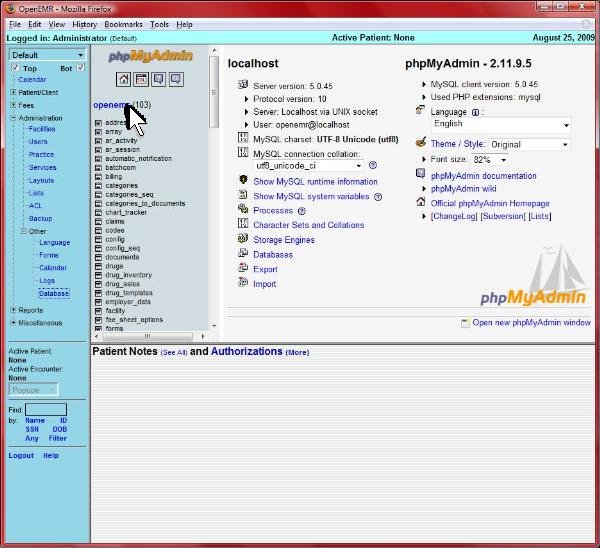
- Click 'openemr' database link near top left (highlighted by arrow). (screenshot below)
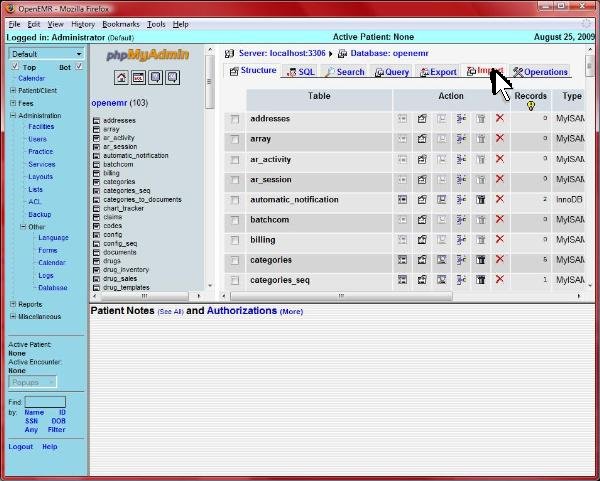
- Click 'Import' near top right (highlighted by arrow). (screenshot below)
- Click 'Browse' (highlighted by arrow). (screenshot below)
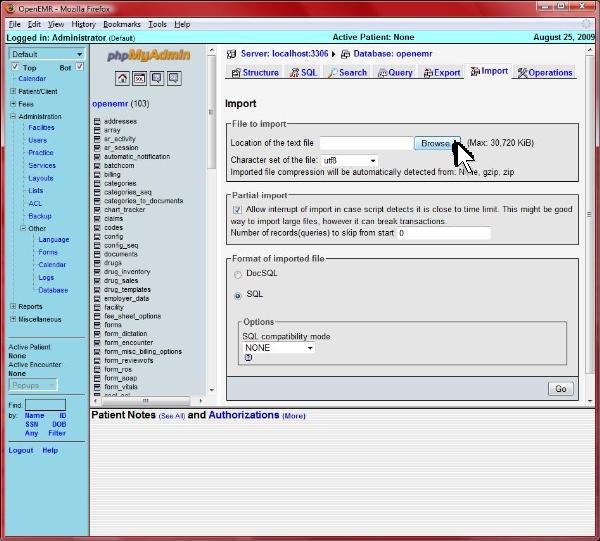
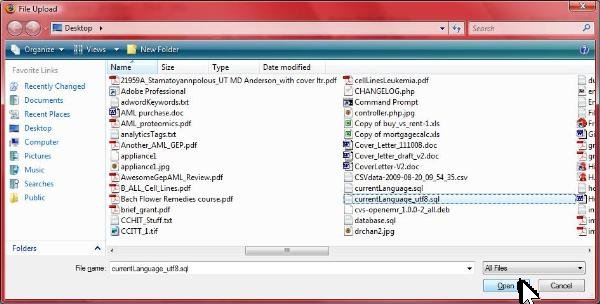
- Select the 'currentLanguage_utf8.sql' (or languageTranslations_utf8.sql) file that you downloaded in above first step, and click 'Open'. (screenshot below)
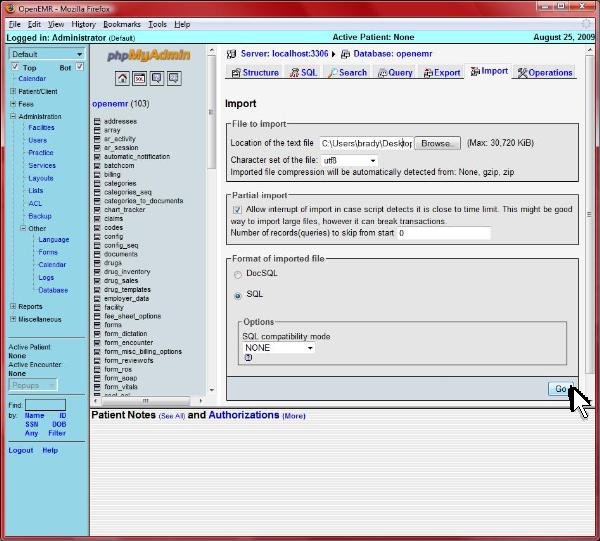
- Click 'Go' at bottom right (highlighted by arrow). After click, the import can take up to a minute or so. (screenshot below)
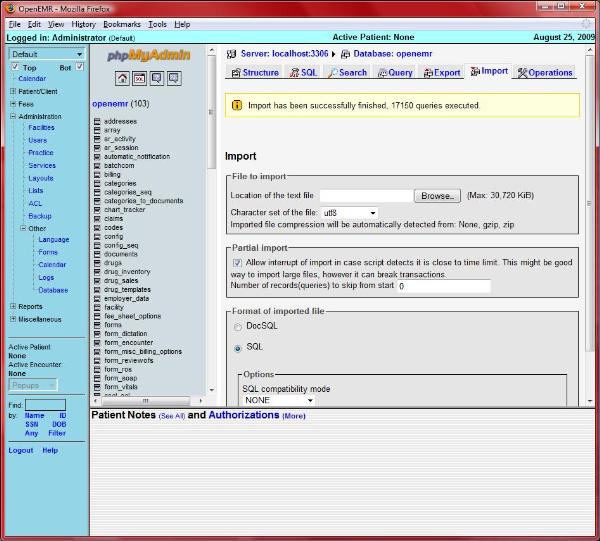
- After import is done, you should see the yellow banner stating the import has been successfully finished. (screenshot below)
- The last thing to do is to synchronize your custom translations. (Note that all translations and constants that you have added (since OpenEMR version 4.0) via the Administration->Language editor are saved in a sql table entitled lang_custom; this allows you then to add these back after importing the standard set of tables above). To do this, go to Administration->Other->Language, click 'Manage Translations' at the top, and then click the 'Synchronize' button.