Difference between revisions of "Portal Audits"
Harley Tuck (talk | contribs) (added page; edits -n- tweaks to follow) |
Harley Tuck (talk | contribs) m (→Audit Workflow) |
||
| Line 6: | Line 6: | ||
= Audit Workflow = | = Audit Workflow = | ||
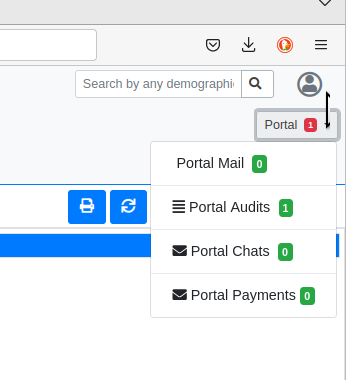
When any communications have been submitted from the portal by any patient, a portal- enabled practice staff will see ‘Portal’ and a red number below the logged in user’s icon.* Click the number to drop down a display of the communications waiting to be processed. | When any communications have been submitted from the portal by any patient, a portal- enabled practice staff will see ‘Portal’ and a red number below the logged in user’s icon. | ||
* Click the number to drop down a display of the communications waiting to be processed. | |||
* The Audits and Chats are handled through the Portal Dashboard | * The Audits and Chats are handled through the Portal Dashboard | ||
[[Image:portalaudit001.png|center]] | |||
Open the Portal Dashboard and click the ‘Audits’ button to see the waiting audits (not pictured) | |||
[[Image:portalaudit02.png]] | [[Image:portalaudit02.png]] | ||
| Line 79: | Line 24: | ||
2. Click on a document to open it | 2. Click on a document to open it | ||
[[Image:portalaudit03.png]] | [[Image:portalaudit03.png]] | ||
Revision as of 21:40, 19 January 2023
Introduction
Another function provided by the patient portal dashboard is to process documents sent from the portal by the patient to the practice staff. When the patient fills out the form in their portal document center then clicks ‘Submit Document’ the document is transferred to the practice’s OpenEMR for processing.
Audit Workflow
When any communications have been submitted from the portal by any patient, a portal- enabled practice staff will see ‘Portal’ and a red number below the logged in user’s icon.
- Click the number to drop down a display of the communications waiting to be processed.
- The Audits and Chats are handled through the Portal Dashboard
Open the Portal Dashboard and click the ‘Audits’ button to see the waiting audits (not pictured)
2. Click on a document to open it
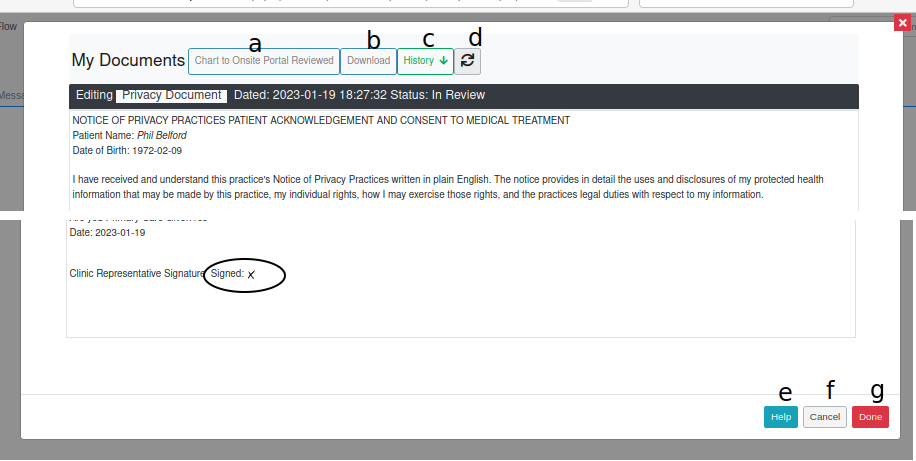
Portal documents may have different controls within the document content but they will all have the same ones along the top of the screen.
- a. Chart to Onsite Portal Reviewed – send this document to the patient’s documment category, ‘Onsite Portal Renewed’
- b. Download – save a copy of this document to the user’s local system
- c. History - shows list of the patient's submitted documents
- d. Circular arrows - reload Document display
At panel bottom:
- e. Help – not completed at time of writing
- f. Cancel – return to Document Center
- g. Done – finished auditing this document
3. Click 'Chart to Onsite Portal Reviewed' to insert the document to the patient’s record.
4. Click ‘Done’
5. The audit screen returns minus the just- audited document and the red number is gone from screen
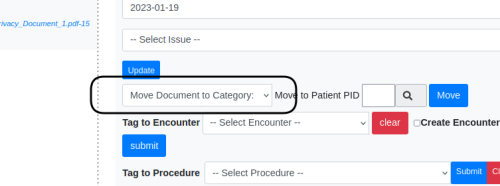
Move Document in EMR
Once the portal document is processed it enters the patient's collection of documents where it can be managed for other purposes. One activity that is useful in this workflow is to move it to a different document category.
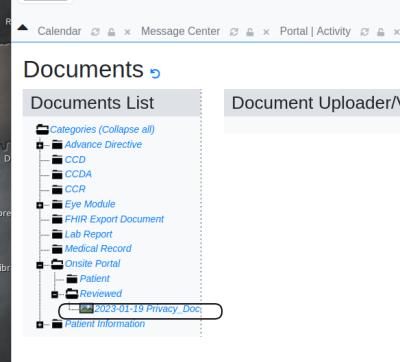
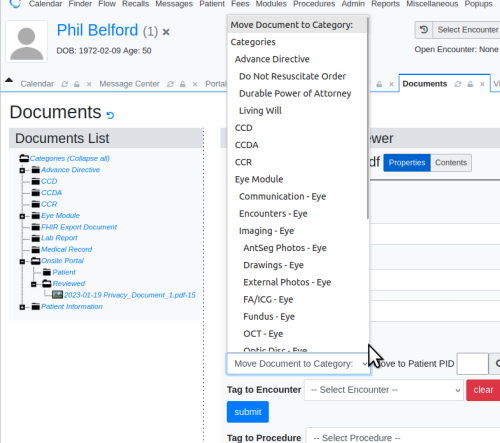
1. Open the patient’s record in the EMR and look in their Documents collection* See the audited doc in category ‘Onsite Portal/ Reviewed’
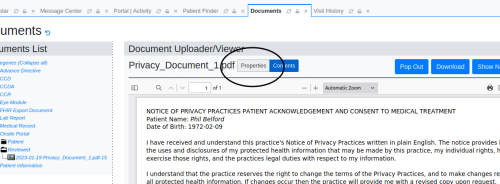
2. Click on the document name
3. Click 'Properties'
Many thgs may be done in the document uploader/ viewer; we are only moving a document to another category.
4. Open the list of document categories
5. Click the category to move it to.
