Difference between revisions of "CQMs – import and calculate (MU3)"
| (29 intermediate revisions by 2 users not shown) | |||
| Line 5: | Line 5: | ||
==Pre-requisites== | ==Pre-requisites== | ||
:* That you have installed on your OpenEMR instance all of the code system types that your previous CEHRT used. We recommend you install the [https://www.open-emr.org/wiki/index.php/Code_Types#CQM_Valueset CQM Valueset]. | :* That you have installed on your OpenEMR instance all of the code system types that your previous CEHRT used. We recommend you install the [https://www.open-emr.org/wiki/index.php/Code_Types#CQM_Valueset CQM Valueset]. | ||
:* That you have followed all other instructions for using OpenEMR as a 2015 ONC | :* That you have followed all other instructions for using OpenEMR as a 2015 ONC certified product. | ||
==Import Clinical Quality Measures QRDA Cat I== | ==Import Clinical Quality Measures QRDA Cat I== | ||
| Line 19: | Line 19: | ||
<li>Wait for your import files to finish uploading. | <li>Wait for your import files to finish uploading. | ||
[[File:Carecoordination-import-progress.png]]</li> | [[File:Carecoordination-import-progress.png]]</li> | ||
<li>Check for any duplicates. If you have duplicates follow the [[#Clinical Quality Measures Patient De-Duplication]] process.</li> | <li>Check for any duplicates. If you have duplicates follow the [[#Clinical Quality Measures Patient De-Duplication|Clinical Quality Measures Patient De-Duplication]] process.</li> | ||
<li> | <li> | ||
<li>Select the Chart Pending button [[File:Carecoordination-chart-pending.png|Carecoordination Chart Pending Button]]</li> | <li>Select the Chart Pending button [[File:Carecoordination-chart-pending.png|Carecoordination Chart Pending Button]]</li> | ||
| Line 25: | Line 25: | ||
</ol> | </ol> | ||
== | ==Export QRDA Cat III Aggregate Report== | ||
Now that you have imported your patient documents you can generate an aggregated QRDA document (Category III / Category 3) document to submit to CMS. To do that you can follow these steps: | Now that you have imported your patient documents you can generate an aggregated QRDA document (Category III / Category 3) document to submit to CMS. To do that you can follow these steps: | ||
<ol> | <ol> | ||
<li>Open the Care Coordination Module by going to the main menu and opening Modules -> Carecoordination</li> | <li>Open the Care Coordination Module by going to the main menu and opening Modules -> Carecoordination | ||
<li>Open the export tab [ | [[File:Carecoordination-step1.png|Modules -> Carecoordiation|Step 1: Go to Modules -> Carecoordiation]] | ||
<li> | </li> | ||
<li>Select the measure(s) you want to export [ | <li>Open the export tab [[File:Carecoordination-tabs-export.png]]</li> | ||
<li>For more advanced search settings (filter by provider, billing facility, etc) see the Advanced Search Settings | <li>Select the search button [[File:Carecoordination-btn-search.png]] to see the carecoordination export search dialog | ||
<li>Hit the search button [ | [[File:Carecoordination-search-dialog.png]] | ||
</li> | |||
<li>Select the measure(s) you want to export [[File:Carecoordination-search-measures.png]]</li> | |||
<li>For more advanced search settings (filter by provider, billing facility, etc) see the [[#Export Advanced Search Settings|Export Advanced Search Settings]]</li> | |||
<li>Hit the search button [[File:Carecoordination-export-dialog-search-btn.png]]</li> | |||
<li> | <li> | ||
You will see a list of patients that you can export. Select the checkboxes next to the patients you wish to export. You can also select the checkbox at the top of the column to select everything. | You will see a list of patients that you can export. Select the checkboxes next to the patients you wish to export. You can also select the checkbox at the top of the column to select everything. | ||
[[File:Carecoordination-step2.png|Modules -> Carecoordiantion|Step 2: Choose person and click SEND TO button]] | [[File:Carecoordination-step2.png|Modules -> Carecoordiantion|Step 2: Choose person and click SEND TO button]] | ||
</li> | </li> | ||
<li>Now click the '''Send To''' button | <li>Now click the '''Send To''' button [[File:Carecoordination-btn-send-to.png]] to open the Send Dialog | ||
[ | [[File:Carecoordination-dialog-send-to.png]] | ||
</li> | </li> | ||
<li>Select the Download option [ | <li>Select the Download option [[File:Carecoordination-dialog-send-to-download-option.png]]</li> | ||
<li>Choose the '''QRDA III''' option, the measures you wish to send | <li>Choose the '''QRDA III''' option, the measures you wish to send, and then press the '''Send''' button | ||
[ | [[File:Carecoordination-dialog-send-to-send-btn.png]] | ||
</li> | </li> | ||
<li>Wait for the file to download. Once you have the downloaded file upload it to the CMS eCQM website portal</li> | <li>Wait for the file to download. Once you have the downloaded file upload it to the CMS eCQM website portal</li> | ||
</ol> | </ol> | ||
==Export Advanced Search Settings== | |||
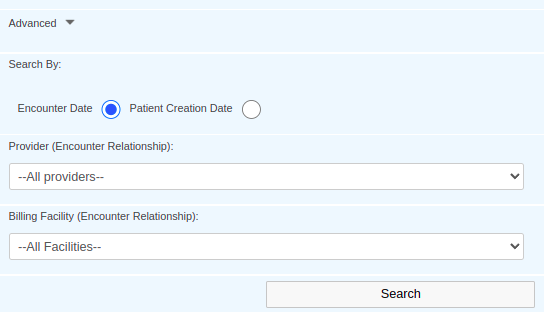
In the Carecoordination Search dialog you can get to the advanced settings by selecting the Advanced Settings heading | |||
[[File:Carecoordination-dialog-search-advanced-settings-btn.png]] | |||
<p>Which opens the following settings screen</p> | |||
[[File:Carecoordination-dialog-search-advanced-settings.png]] | |||
<p>The following settings can be used to modify your search parameters:</p> | |||
<ul> | |||
<li>Search By - Choose the date field you want to use for filtering the patient records. Current options are: | |||
<ul> | |||
<li>Encounter Date - include patients where they have at least one encounter service date that matches the start and end date of the encounter</li> | |||
<li>Patient Creation Date - include patients where the patient was created between the start and end date chosen.</li> | |||
</ul> | |||
</li> | |||
<li>Provider (Encounter Relationship) - Selecting a specific provider will filter only those patients that have an encounter relationship with this provider.Note: Only providers that have an NPI number will be in this list.</li> | |||
<li>Billing Facility (Encounter Relationship) - Selecting a specific billing facility will filter the Care coordination patients displayed to only include patients that have an encounter that have this assigned billing facility</li> | |||
</ul> | |||
==Clinical Quality Measures Patient De-Duplication== | ==Clinical Quality Measures Patient De-Duplication== | ||
===Overview=== | ===Overview=== | ||
This guide explains how to work through a clinical quality measures de-duplication process. If you are combining QRDA Cat 1 documents from multiple sources and upload them at a single time into OpenEMR then you are likely going to need to deal with merging, removing, and processing duplicate data values into OpenEMR. | This guide explains how to work through a clinical quality measures de-duplication process. If you are combining QRDA Cat 1 documents from multiple sources and upload them at a single time into OpenEMR then you are likely going to need to deal with merging, removing, and processing duplicate data values into OpenEMR. | ||
We'll be discussing the various sections of an import process with duplicates as illustrated in this screenshot: | We'll be discussing the various sections of an import process with duplicates as illustrated in this screenshot: | ||
| Line 136: | Line 157: | ||
</li> | </li> | ||
</ol> | </ol> | ||
Latest revision as of 20:39, 7 June 2024
Import Clinical Quality Measures (QRDA Cat I) and export (QRDA Cat III)
If you have been tracking your Clinical Quality Measures in another CEHRT (Certified Electronic Health Record Technology) system and wish to import your CQM data into OpenEMR and calculate eCQMs to submit to CMS you can do so by doing following this guide.
Pre-requisites
- That you have installed on your OpenEMR instance all of the code system types that your previous CEHRT used. We recommend you install the CQM Valueset.
- That you have followed all other instructions for using OpenEMR as a 2015 ONC certified product.
Import Clinical Quality Measures QRDA Cat I
- Export all of your patient data in your previous CEHRT system as QRDA Cat I files.
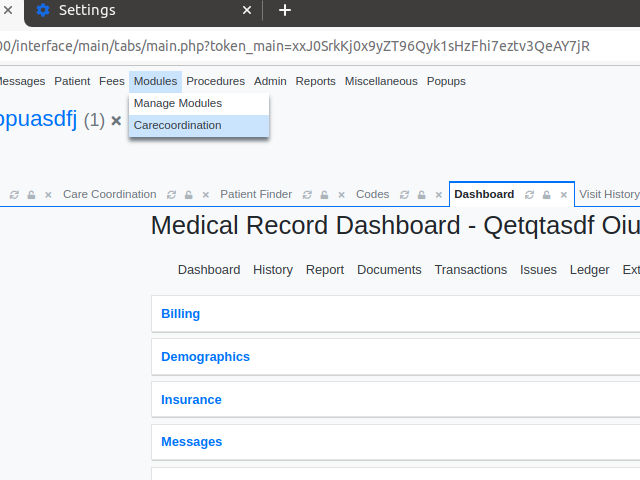
- Open the Carecoordination module from the Modules -> Carecoordination menu.
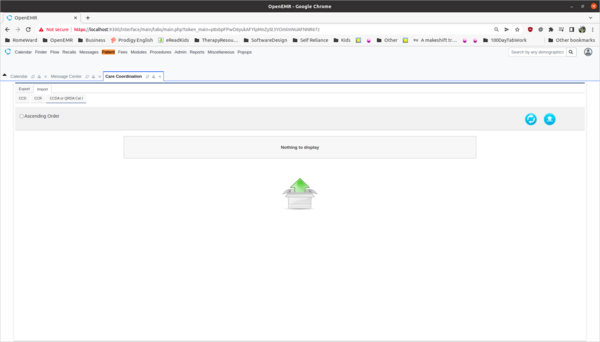
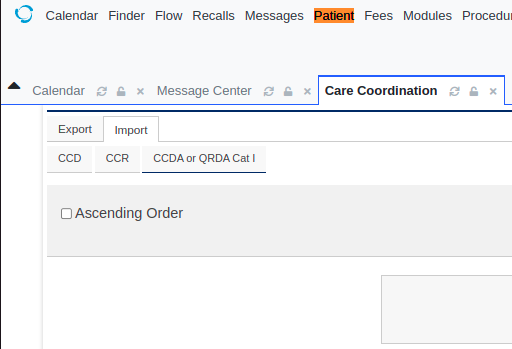
- Select the Import tab and make sure you select the CCDA or QRDA Cat 1 tab inside the import area
- Use either the upload button
 or drag your QRDA Cat I xml files to the upload area of the page
- Wait for your import files to finish uploading.
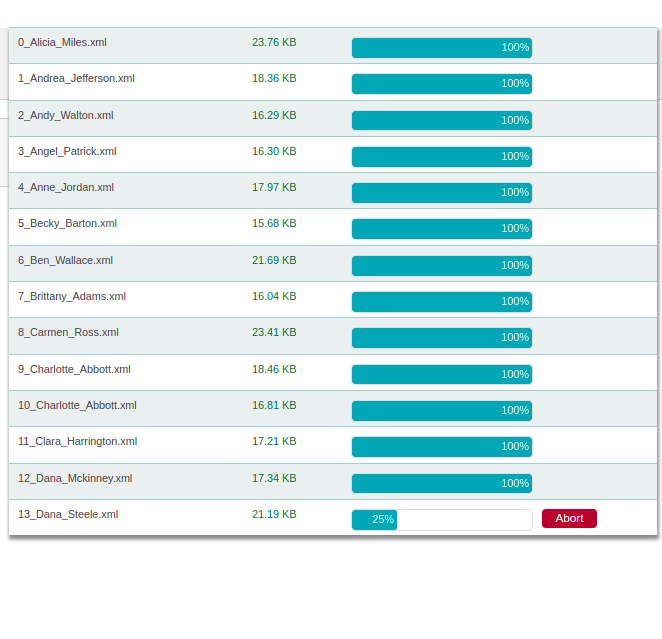
- Check for any duplicates. If you have duplicates follow the Clinical Quality Measures Patient De-Duplication process.
- Select the Chart Pending button

Export QRDA Cat III Aggregate Report
Now that you have imported your patient documents you can generate an aggregated QRDA document (Category III / Category 3) document to submit to CMS. To do that you can follow these steps:
- Open the Care Coordination Module by going to the main menu and opening Modules -> Carecoordination

- Open the export tab
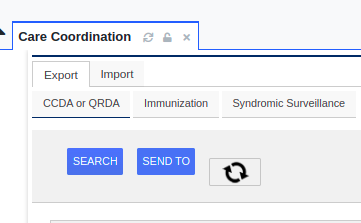
- Select the search button
 to see the carecoordination export search dialog
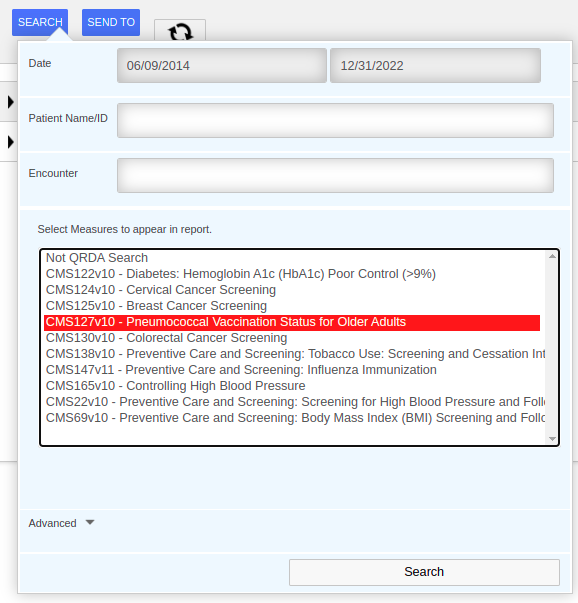
- Select the measure(s) you want to export
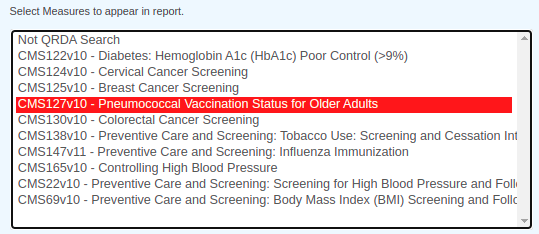
- For more advanced search settings (filter by provider, billing facility, etc) see the Export Advanced Search Settings
- Hit the search button

-
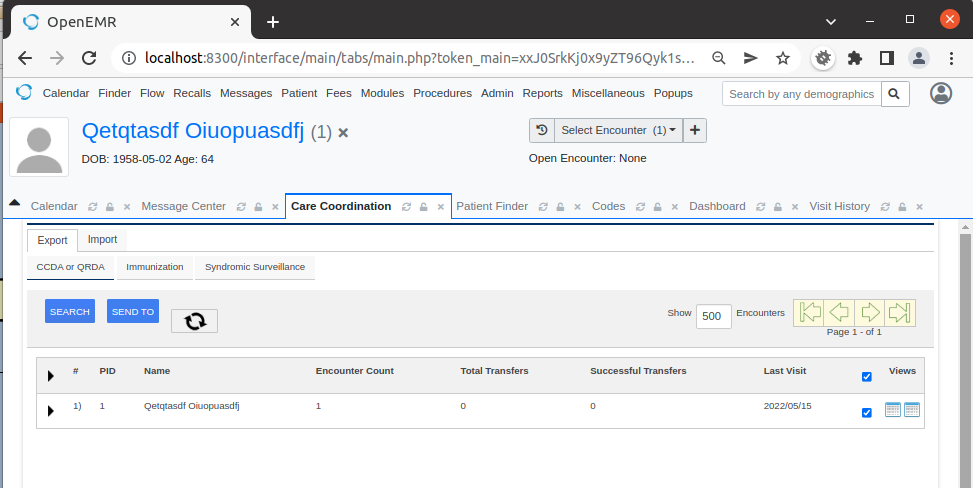
You will see a list of patients that you can export. Select the checkboxes next to the patients you wish to export. You can also select the checkbox at the top of the column to select everything.
- Now click the Send To button
 to open the Send Dialog
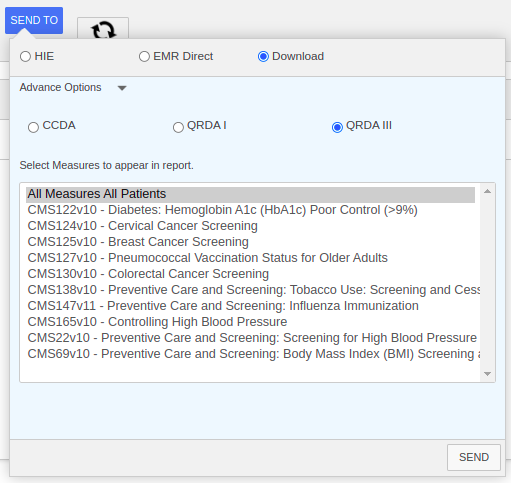
- Select the Download option

- Choose the QRDA III option, the measures you wish to send, and then press the Send button

- Wait for the file to download. Once you have the downloaded file upload it to the CMS eCQM website portal
Export Advanced Search Settings
In the Carecoordination Search dialog you can get to the advanced settings by selecting the Advanced Settings heading
![]()
Which opens the following settings screen
The following settings can be used to modify your search parameters:
- Search By - Choose the date field you want to use for filtering the patient records. Current options are:
- Encounter Date - include patients where they have at least one encounter service date that matches the start and end date of the encounter
- Patient Creation Date - include patients where the patient was created between the start and end date chosen.
- Provider (Encounter Relationship) - Selecting a specific provider will filter only those patients that have an encounter relationship with this provider.Note: Only providers that have an NPI number will be in this list.
- Billing Facility (Encounter Relationship) - Selecting a specific billing facility will filter the Care coordination patients displayed to only include patients that have an encounter that have this assigned billing facility
Clinical Quality Measures Patient De-Duplication
Overview
This guide explains how to work through a clinical quality measures de-duplication process. If you are combining QRDA Cat 1 documents from multiple sources and upload them at a single time into OpenEMR then you are likely going to need to deal with merging, removing, and processing duplicate data values into OpenEMR.
We'll be discussing the various sections of an import process with duplicates as illustrated in this screenshot:

First let's breakdown each of the columns and what they mean in the import process

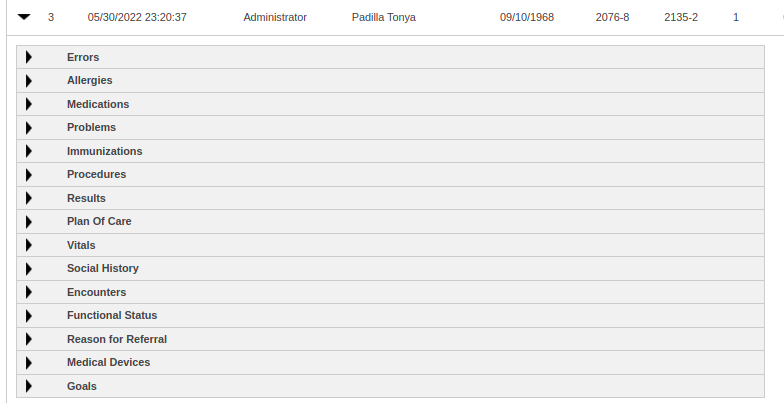
 Expand / Collapse - Press these icons to expand/collapse the patient data and be able to drill down on each individual section to preview the data elements you are importing. You can use this functionality to compare differences between patient data and determine to either remove the record from being imported or whether to merge the record into your patient charts. The main notable area to pay attention to is the Errors section as this will display any XML Schematron errors that may be present in the document.
A preview of the sections can be displayed here:
- # - The number the record was parsed in the import files you uploaded
- Date - The date and time the record was parsed in the system
- Owner - The user that imported the records
- Patient Name - The name of the patient
- DOB - The date of birth of the patient
- Race - The race code we found from the import
- Ethnic - The ethnic code we found from the import
- Enc - The number of encounter records that were found in the QRDA Cat 1 file. If no encounters were found this will be 0.
- CP - The number of Care Plan records that were found in the QRDA Cat 1 file. 0 if none were found.
- OB - The number of observations that were found in the QRDA Cat 1 file. 0 if none were found
- Proc - The number of procedures that were found in the QRDA Cat 1 file. 0 if none were found
- Prob - The number of medical problems that were found in the QRDA Cat 1 file. 0 if none were found
- Match Found - If an already existing patient match was found in the system. Yes if there is a match, No if there isn't one.
- Matched Patient - The name of the matched patient if one is found in the system.
- Duplicate - duplicate error messages are displayed here. If you select the error message it will ask you if you'd like to delete the record
- Type - What type of record this is. For eCQMs this will be a QRDA record type
 Merge to any patient icon - Clicking this button lets you select a specific patient you want to merge this record into.
 View details -- View a full printable page of the Cat 1 information
 Add as new patient -- Add the record as a brand new patient into the system.
Patient De-Duplication
Look at the error messages in the duplicate column to first identify how the system is matching the duplicate.
![]()
Compare the component counts in the columns and especially pay attention to the encounter count. If the component counts are different then you will need to bring in the record and utilize the patient merge tools to reconcile the information.
If after examining the record information for a duplicate account you wish to remove one of the records from the import you can select the duplicate error message. You will be asked to confirm that you want to remove this record. After confirming the removal, the duplicate record will be removed.
The system will attempt to give you guidance on how to handle the duplicate records with the following messages:
- Name Misspelled - a record was found where the component counts and patient demographics information match but the name is mispelled. Look at the validation errors section and compare components such as encounter to verify the record is indeed a duplicate. If so, you can safely delete this information.
- Matched Demo and DOB - a record was found with the same component counts and exact name and demographics information. Compare the component section information and remove one of the records if everything matches.
- Matched Demo and DOB with Mismatched Components - a record was found similar with another import but the component counts were not matched. There are two ways this duplicate record may need to be handled. If the record has existing encounter information then you will need to follow the Merge Patient steps. If the record has no encounter information then you should check the errors validation section. If the document is invalid or missing information then you can discard the record. If the validation passes then You will need to follow the Merge Patients With De-Duplication of Encounters process.
Merge Patient
To merge two duplicate patients that have different components (with no duplicate encounters) do the following:
-
Go to the main menu for Admin->Patients->Manage Duplicates
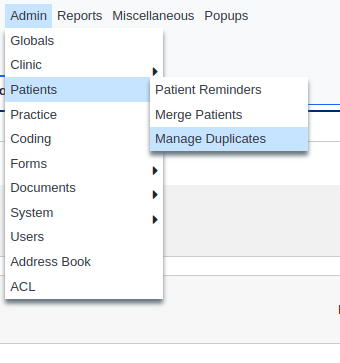
- Find the name of the patient you wish to merge. There should be two records displayed with the same patient name for the patient you wish to merge. For the 2nd record choose the Merge and Discard option in the dropdown.
 This takes you to the patient merge screen:
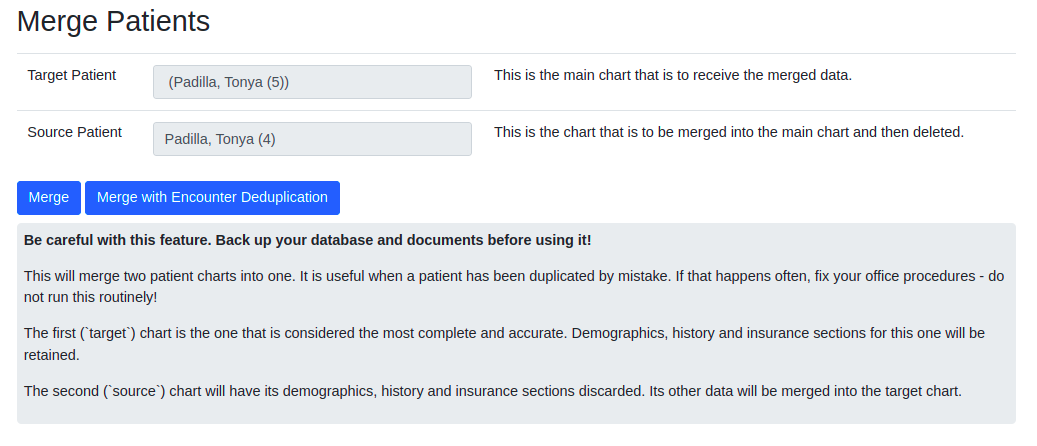
- Select the Merge button
 . This will combine all of the patient records and patient documents into a single patient record. The database commands that were used to merge the patient record will be displayed if you or a developer need to see what exactly occurred in the system.

Merge Patients With De-Duplication of Encounters
When a Carecoordination CCD-A file is sent without any encounter information but there are components that in OpenEMR are connected to an encounter, the system will generate an encounter to connect the components with the patient record. These components include things such as medical procedures, care plans, observations. If there are duplicate patient records these encounters must be merged and combined. For each patient record you wish to merge do the following:
Note this is a non-recoverable operation. For production machines it is recommended that you backup your system (database and documents) before doing any patient data merging.
-
Go to the main menu for Admin->Patients->Manage Duplicates

- Find the name of the patient you wish to merge. There should be two records displayed with the same patient name for the patient you wish to merge. For the 2nd record choose the Merge and Discard option in the dropdown.
 This takes you to the patient merge screen:

- Select the Merge with Encounter De-Duplication button
 . This will combine all of the patient records and patient documents into a single patient record. Any encounters that are found to be duplicates will be combined with all of their associated patient record data merged into the combined encounter record. The database commands that were used to merge the patient record will be displayed if you or a developer need to see what exactly occurred in the system.

