Difference between revisions of "HOWTO: Use the OpenEMR DICOM Web Viewer"
Harley Tuck (talk | contribs) |
Harley Tuck (talk | contribs) m (→Introduction: corrected link) |
||
| Line 3: | Line 3: | ||
= Introduction = | = Introduction = | ||
This is an update and expansion of the original docs by the developer which are found at [DICOM_Uploader,_Storage_Engine_and_Viewer]. It shows the viewer, its features and usage as found in OpenEMR version 7.0.2 (1). | This is an update and expansion of the original docs by the developer which are found at [[DICOM_Uploader,_Storage_Engine_and_Viewer]]. It shows the viewer, its features and usage as found in OpenEMR version 7.0.2 (1). | ||
| Line 12: | Line 12: | ||
* Clicking on compatible files in a patient's Documents tree. Best for simple storage of the files, since network bandwidth limitations can slow down viewing and annotating. | * Clicking on compatible files in a patient's Documents tree. Best for simple storage of the files, since network bandwidth limitations can slow down viewing and annotating. | ||
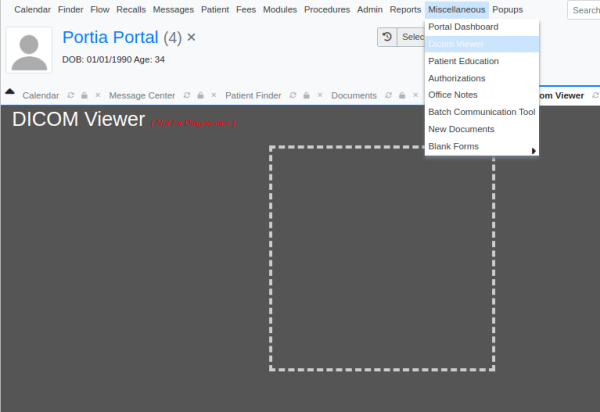
* Opening the viewer from OpenEMR's main menu at ‘Miscellaneous/ DICOM Viewer’. It uses a DICOM file that resides in the local computer, which makes for faster viewing. | * Opening the viewer from OpenEMR's main menu at ‘Miscellaneous/ DICOM Viewer’. It uses a DICOM file that resides in the local computer, which makes for faster viewing. | ||
= Uploading Files = | = Uploading Files = | ||
Latest revision as of 21:42, 12 September 2024
v7 Update
Introduction
This is an update and expansion of the original docs by the developer which are found at DICOM_Uploader,_Storage_Engine_and_Viewer. It shows the viewer, its features and usage as found in OpenEMR version 7.0.2 (1).
The OpenEMR DICOM Web Viewer (DWV) by Jerry Padgett is a tool with which a user can view and annotate DICOM images. Note: it is not certified for diagnostic use but can be used to determine if further investigation with a certified viewer is indicated.
Users can access DWV with two methods in OpenEMR:
- Clicking on compatible files in a patient's Documents tree. Best for simple storage of the files, since network bandwidth limitations can slow down viewing and annotating.
- Opening the viewer from OpenEMR's main menu at ‘Miscellaneous/ DICOM Viewer’. It uses a DICOM file that resides in the local computer, which makes for faster viewing.
Uploading Files
To start: have your DICOM files in a known location on your local computer.
Documents Tree Method
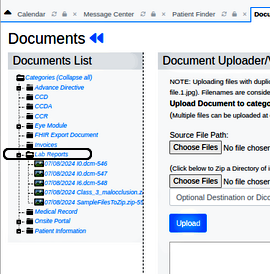
1. Click the documents tree folder (here, using ‘Lab Reports’) where the DICOM content is to be stored.
- Consider creating a dedicated DICOM folder per the instructions in OpenEMR_7_Practice_Settings#Documents OpenEMR_7_Practice_Settings#Documents.
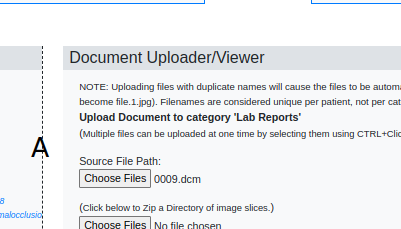
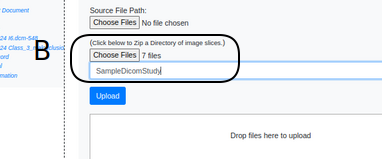
2. Click a ‘Choose Files’ upload button (lettered in images below)
- A. 1st button is to upload individual .dcm files
- files will be saved with existing file name
- B. 2nd button is to upload a folder that contains a collection of .dcm study files
- all files will be zipped by OpenEMR to conserve space on the server
- locate and click on the local folder name-- do not open the folder to display the files
- DWV will gather the files into a zip file which will be named what you enter in the 'Optional Destination or Dicom Study Name' text area per the entry in the txt area
/OR/ if no name is given it will be named '[date]DicomStudy.zip-[uniqueID]'
3. Click blue 'Upload' button (previous image above) and approve it
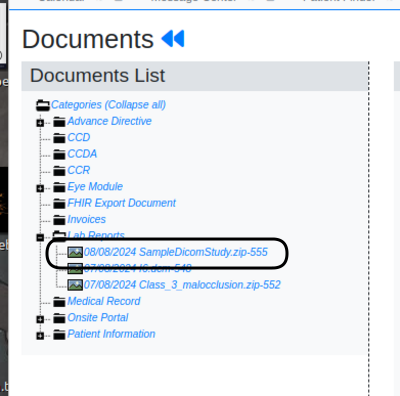
The uploaded file will appear in the documents tree (oval above)
4. To view the file or DICOM study click on the .dcm or the .zip file in the tree displayNotes:
- the upload can be slow depending on your system bandwidth, and your server may timeout if if it does not allow enough time. In my test environment a folder containing 500 files of 45kb each took appx 1 minute (60 seconds)
- If viewing zip files larger than a few dozen mb the viewer may be slow or the progress bar could stop. Try downloading the file to the local computer and opening the DWV through the OpenEMR Main Menu (see below).
- when upload to repository or viewer is complete the progress bar disappears and the upload buttons say '0 file'
OpenEMR Main Menu Method
1. From the Main Menu open the Viewer: ‘Miscellaneous/Dicom Viewer’
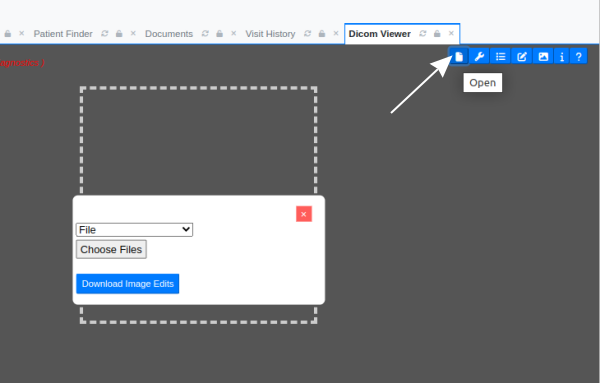
2. Click the file icon to show the 'file open' control
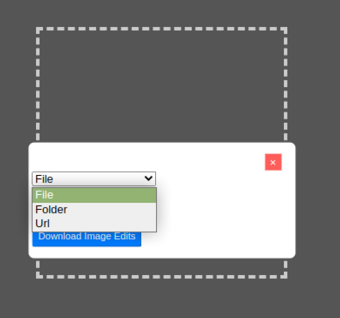
3. Select from dropdown either 'File' or 'Folder'
- 'File'/'Folder' opens similarly to first and second buttons, respectively, in documents tree method described above
- 'Choose Files ' gives upload dialog to load file(s) same as above
- 'URL' option is not developed at present
- 'Download Image Edits' - if available
4. Click 'Choose Files' and select the file to upload
5. Once the image is in the viewer the loading will stop.
Click red X at top right of load dialog (above)
6. Use toolbar at top right to work with DICOM file (see in step 2 above)
Quick summary of tools
** Viewer operation is not described here **
‘Page’: toggles file load dialog (shown above)
‘Wrench’: with image(s) loaded, shows tools appropriate to the image. In other words, if it is a zip file containing an entire study it has controls for managing multiple images.
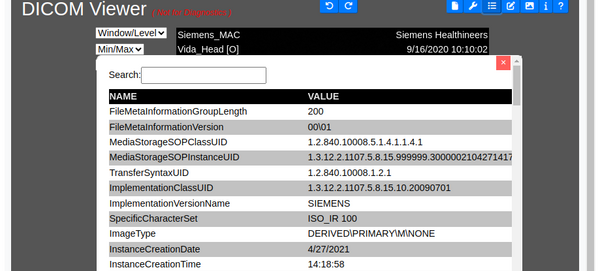
![]() ‘DICOM tags’: shows the tags in the study
‘DICOM tags’: shows the tags in the study
![]() ‘Annotations’: if any have been made (none here)
‘Annotations’: if any have been made (none here)
‘Image’: Toggle image visible or not
‘Info’: Toggle image info visible or not
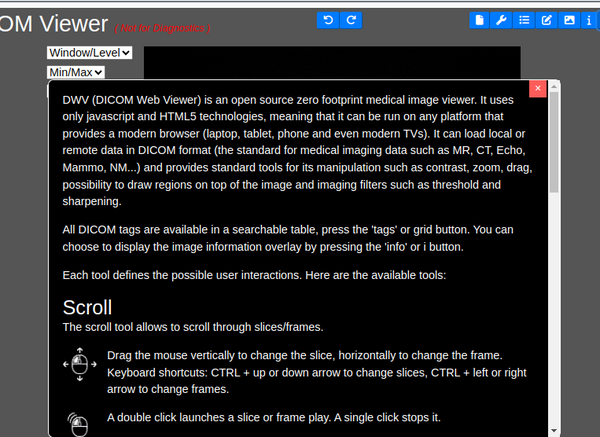
'?': The developer's help resources
Conclusion
OpenEMR’s DICOM viewer is a useful tool for viewing DICOM studies and individual files. As mentioned elsewhere, it is not certified for diagnostic use so keep that in mind.
