Difference between revisions of "HOWTO: Create And Use Database Views"
(added page content) |
m (oops- took off extraneous content...) |
||
| Line 1: | Line 1: | ||
'''Purpose: ''' | '''Purpose: ''' | ||
Revision as of 03:11, 17 June 2015
Purpose:
Reports may be extracted from OpenEMR's database with a few different methods. Some require software developer expertise; others, in development as I write this (http://sourceforge.net/p/openemr/discussion/202504/thread/50c46053/?limit=25#f5aa), will be extremely useful for the person with skills in other areas besides computer science. The method described here using database views is a compromise: if somebody with coding skills provides the database query, most any person can set up a reusable database 'view' which will then generate a custom report on demand.
Documented using:
- OpenEMR 4.2.0 (1)
- phpMyAdmin 4.2.5
- Linux Mint 17 / Mate
- HTuck - MI-Squared
Procedure:
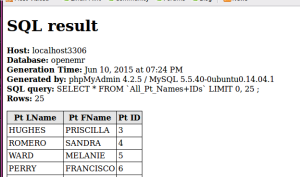
Obtain SQL Code
- SQL (spoken as "sequel" or spelled out "S Q L") code, or a SQL query, is the computer language which extracts data from a database. Unless you know that you can create good SQL queries, it would be best to obtain them from a professional: a miswritten query can irretrievably destroy the database. However, a properly written query is completely safe and very useful.
Therefore, of course the preliminary step to this tutorial is:
0. Backup your database
- The specific variant of the SQL language that queries must be written in for the OpenEMR database is called, “mySQL”.
- Database manipulation such as running queries and views is performed in the database administration tool, 'phpMyAdmin', included in OpenEMR.
- OpenEMR Administrator access privileges should be required to create and run a database view.
Create The Database View
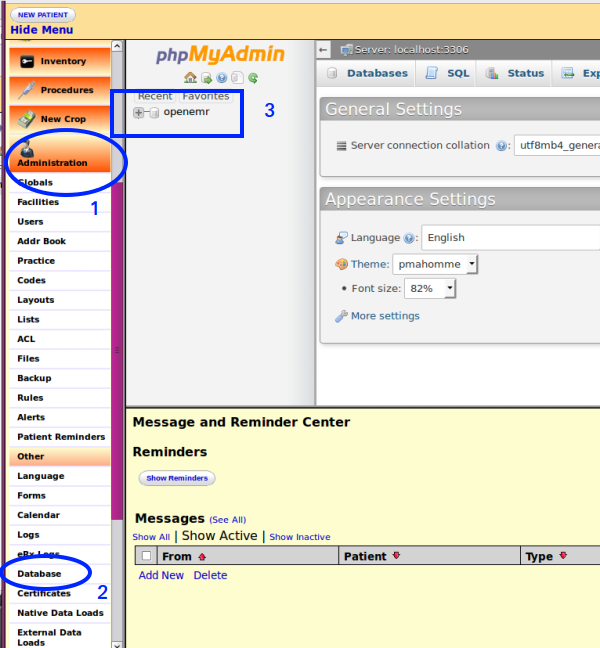
Open the database on left nav menu:
- 1. 'Administration
- 2. Other - Database '
(ovals)
- 3. Click on the database name
(rectangle)
(yours may well be different)
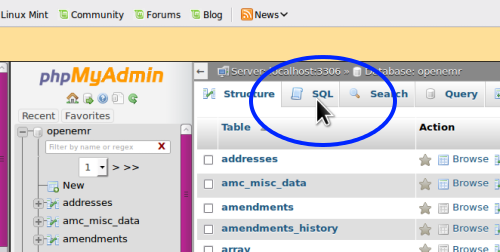
- 4. Click the SQL tab (blue oval)
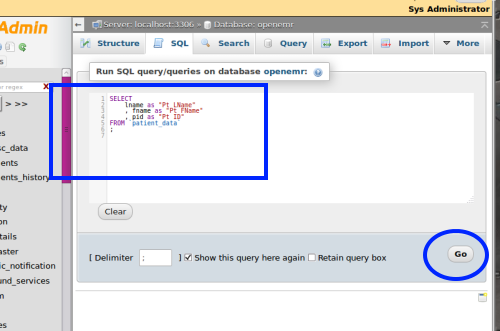
- 5. Copy and paste the SQL query into the text area (blue rectangle)
- 6. Click 'Go' button lower right (oval)
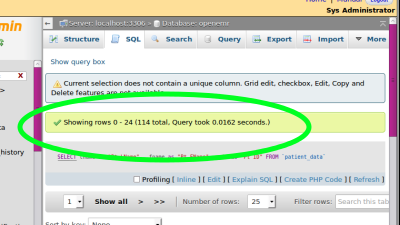
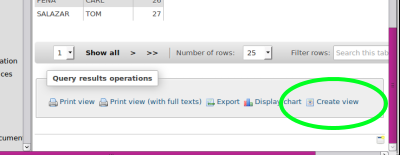
- 7.Click 'Create View' link (green oval) at bottom of report results
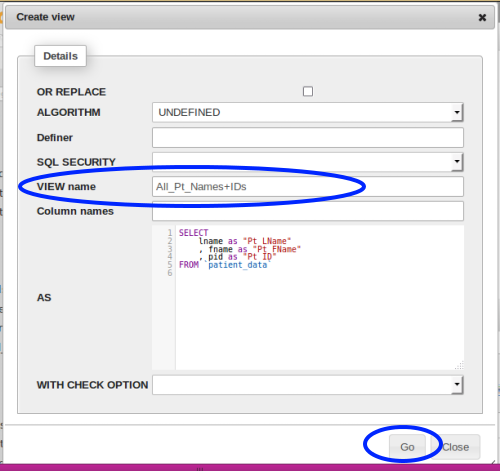
- 8. For now just fill in a descriptive 'View name', then
- 9. Click 'Go' (blue ovals)
The view has been saved; you will see where it's stored in the next section.
- 10. Exit phpMyAdmin: click on any left nav menu item.
Run Database View
- 11. Start here if you have already created the view.
- 12. Open the database, per steps 1, 2 and 3 above.
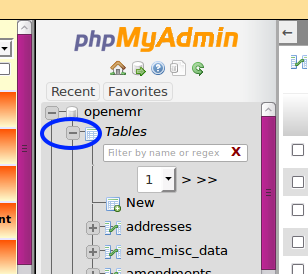
The left margin of phpMyAdmin will appear as in the picture:
- 13. Click the '-' (minus) icon (blue oval) in front of 'Tables to shrink the table listing and see your 'Views'
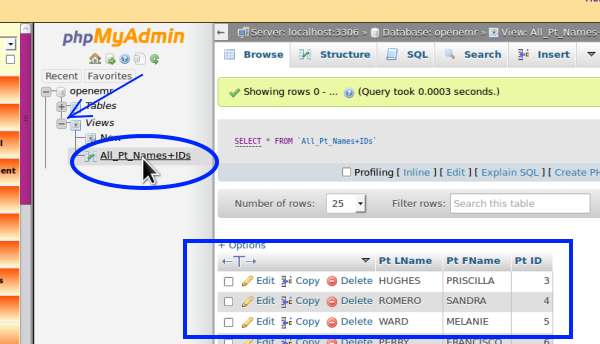
- 14. Click the '+' (plus) button to expand the list (arrow)
- 15. Click the view name to run the view (oval)
the report appears in bottom of right panel (blue rectangle)
Export Report
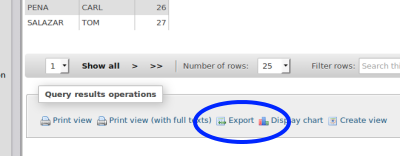
At bottom of report display, select the desired form for the report's output.
- the two 'Print View's offer quick and easy printouts
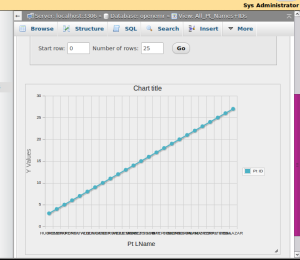
- 'Display Chart' - limited options but pretty cool
- the 'Export' option creates reports in many formats including spreadsheet- compatible formats (rectangle)
Exporting most of the many formats available in the dropdown is straightforward; if you know how to use those formats you will probably be aware of their parameters.
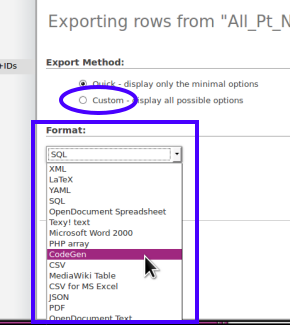
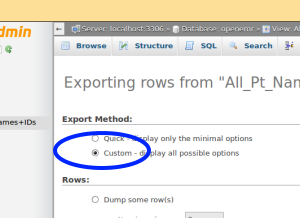
- 'custom' radio button (oval) allows several options such as including/ excluding column names.
I will briefly describe here how to export as a .csv file the report from your database view for use in an open source spreadsheet such as LibreOffice. Instructions for importing .csv files into MS Office are available on the Internet.
- 16. Below the report display in 'Query Results Operations' select the 'Export' option
In the "Exporting rows..." display :
- 17. Click the 'Custom' radio button for the export method
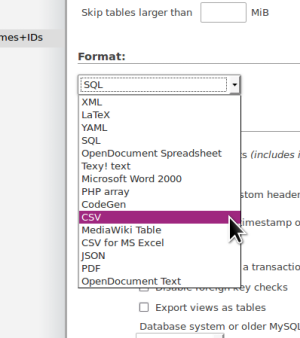
- 18. Select “CSV” from 'Format' dropdown list
(notice option for “CSV for MS Excel”; handy if you're using that platform)
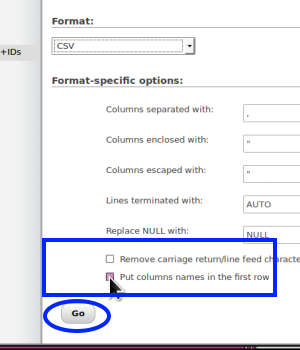
- 19. Scroll to bottom and select “Put column names in the first row”
(rectangle at right)
- 20. Click the 'Go' button (oval)
- 21. Select 'Save File' and 'OK' in the resulting dialog
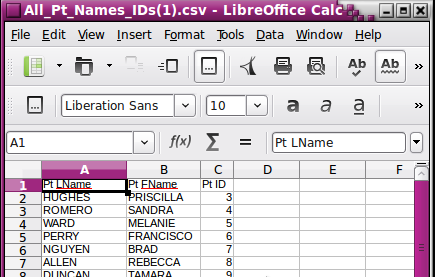
- 22. The .csv file will be saved into your Downloads directory.
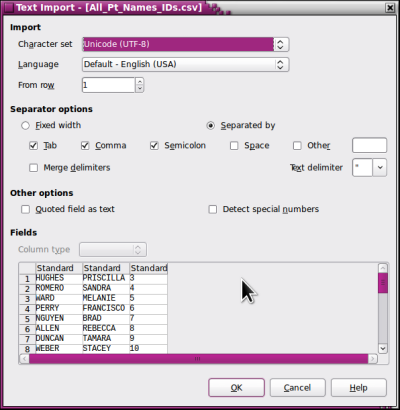
- 23. Click on the .csv file
- 24. Click 'OK' in text import dialog to agree to the delimiters
'
- 25. View the Spreadsheet.
